In the first article SharePoint 2013 : How to migrate SharePoint 2010 Style Workflows – Part 1 of this series on the Workflow migration Process we saw the execution of Steps 1 & 2 for the process.
In this article we are going to see the execution of Steps 3 & 4 and for the sake of quick review I am putting up the process diagram again in here.
Process Diagram

Step 3: Source Site – Create Workflow
- Launch the SharePoint 2013 Designer
- Connect to the Source Site “Site001”
- Click on the Workflows section on the left
- Click on the “Reusable Workflow” Ribbon Control

- Specify the Workflow Name “CustomerLogs”
- Select “CustomerCT” content type that we had provisioned in the earlier steps
- And since this demo is to show how to export SharePoint 2010 Style Workflows so we should choose the Platform Type as “SharePoint 2010 Workflow”
- Click OK to save the Workflow

We can see the new workflow created under “Reusable Workflow” Category

Step 4: Source Site – Test Workflow
Now we have to associate “CustomerLogs” workflow with Content Type “CustomerCT”
To add the association go to Site Settings > Site Content Types
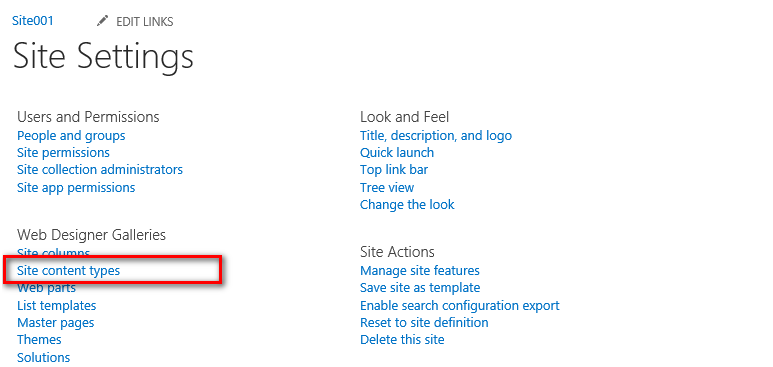
Filter the content types by group “Custom Content Types”
We can see the “CustomerCT” Content Type available in the Site Content Types List
Click on “CustomerCT” Content Type and edit it

Under Settings section click on the “Work Settings”

Click on “Add a Workflow” Link

Under the Workflow Section you should see the “CustomerLogs” workflow list in Workflow Template list and specify a suitable name as “Customer Logging” in this case
Save the Workflow Settings

Now we can see new instance of “CustomerLogs” workflow associated with “CustomerCT” content type
 Now lets’ create a Test SharePoint List to verify the Workflow is working fine in association with Content Type
- Go to Site Contents
- Select “Custom List” list template to create a list

Let us call this list as “Customers” and click “Create”

We can see the “Customers” List created a successfully

Now we need to add “CustomerCT” content type to the “Customers” list
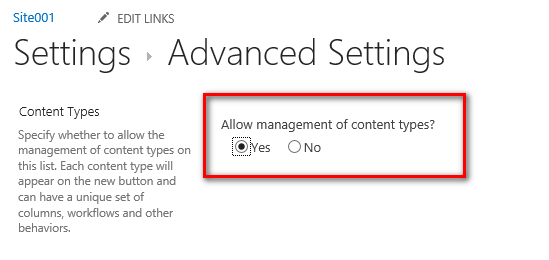
- Go to List Settings
- Click on the “Advanced Settings” link

- Select “Yes” under “Content Types” Section
- Save the settings
Click on the “Add from existing content types” link and select the “CustomerCT” content type


Now create a new item based on “CustomerCT” content type

- Add suitable values to the fields
 Since we did not configured the “CustomerLogs” Workflow to start automatically on “Item Added” or “Item Updated” so we need to manually start it

Now lets’ review the workflow status
Click Ellipsis and select “Workflows” to get the Workflow Start Page

Click on the “Customer Logging” workflow to start

- Click on “Start” button

And we got the workflow started & completed

We can verify the Workflow Status and also the message logged by it to the history log

That is all for this demo.
We will be looking for Step 5 & 6 in Part 3 of this Series.
SHAREPOINT 2013 : HOW TO MIGRATE SHAREPOINT 2010 STYLE WORKFLOWS – PART 3
So guys just stay tuned 🙂
