Uploading large files to SharePoint On-Premise or Online is an obvious problem during data migration from any external systems like Lotus Notes.
Here is one of such errors which we might encounter while trying to upload a file of size greater than 250 MB-

In this article I will explain a data upload strategy where we can split a large file into multiple chunks of smaller size.
Solution Architecture Diagram
For better understanding we can refer to the following solution architecture diagram-

Based on this diagram we can conclude the following facts-
1. This solution can be hosted on multiple servers to launch parallel uploads
2. This solution can consume data from Network File Shares
3. Once data file is retrieved (say of size 300 MB), this solution will split the file (100 MB) automatically based on the pre-configured chunk size (which should not exceed the size limit of 250 MB)
4. Each chunk then appended to the file uploaded in multiple iterations
In order to start with this demo we would need a SharePoint Document Library in SharePoint Online (or On-Premise) Site as shown below-

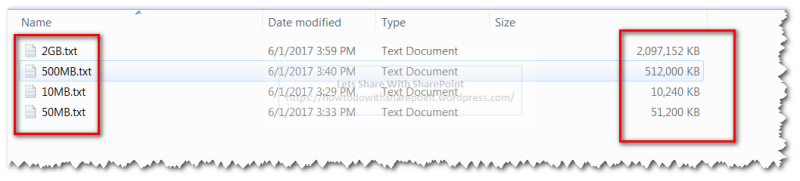
Another prerequisite to demo is to have files of various sizes that we can use to upload to the document library.
I made use of following command line utility to generate files of various sizes. This utility takes destination folder path and size of the file in KBs as input.
Here is the usage example of the command line utility-
fsutil file createnew "C:\Prashant\Self Paced Training\Sample Files\2GB.txt" 2147483648
Similarly I have generated other files too as shown below-
Now let’s dive down into the code to understand the actual implementation.
Step 1: Declare a variables to hold the document library name & folder path. For production use I recommend to have these values in an external configuration file.
Step 2: Reading files from the folder specified in path variable in Step 1
Step 3: Loop through all the files and pass each file to the “UploadLargeFiles” function along with the document library name

Step 4: Generate unique upload id & get file name of the file to be uploaded
Step 5: Get handle on document library object and load the root folder (or any target folder) with in the document library
Step 6: Calculate the block size to be uploaded and total file size (as shown in the architecture diagram)
Step 7: Read the bytes from the source file and set the read buffer based on the block size

Step 8: Read the bytes based on the buffer limit that we set in earlier steps

Step 9: Check if this is the first chunk that is being uploaded, if yes then add a new file to SharePoint Document Library, get the file content based on the buffer size for the chunk and call “StartUpload” function that is defined under “Microsoft.SharePoint.Client.File” class. This will add the file to the document library but with small bunch of content only.
Step 10: Check if this is not the first chunk that is being uploaded, if yes then find the file in document library and get the handle on it
Step 11: If this is another chunk of data which is not the last chunk, this chunk will be appended to the same file by using “ContinueUpload” function that is defined under “Microsoft.SharePoint.Client.File” class. This will append the content to the file identified by Upload Id that we have initialized in earlier steps.
Step 12: If this is last chunk of data, this chunk will be appended to the same file by using “FinishUpload” function that is defined under “Microsoft.SharePoint.Client.File” class. This will append the content to the file identified by Upload Id that we have initialized in earlier steps and commits the changes to the file. Once this function completes successfully the changes will be made persistent to the file.

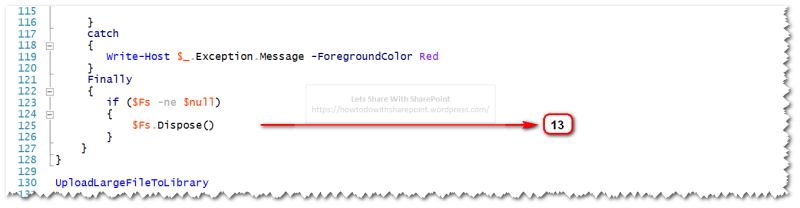
Step 13: Perform exception handling and call the “UploadLargeFileToLibrary”
I recommend to read the documentation on Microsoft.SharePoint.Client.File class and understand functions carefully before using it.
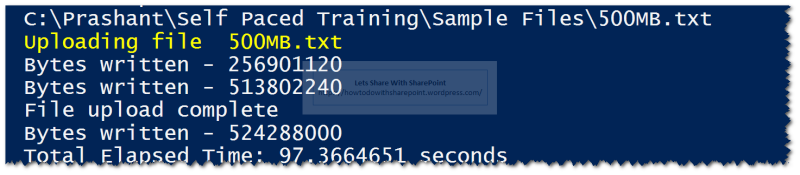
Once we execute this script we can see the following information-
- File Name to be uploaded
- Chunk size
- Total Time taken to upload the files
It is important to note that total time taken to upload the files may vary depending on the hosting environment.
File Size to be uploaded: 10 MB

File Size to be uploaded: 50 MB

File Size to be uploaded: 500 MB
File Size to be uploaded: 2 GB

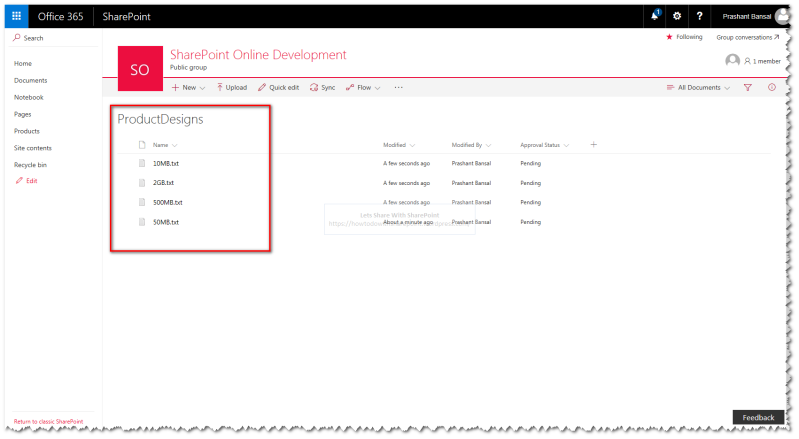
Once the script executed successfully we can see the respective files uploaded to the SharePoint Online Site as shown below-
That is all for this demo.
This article is equally applicable for both SharePoint Online & On-Premise Versions.
Hope you find it helpful.