SharePoint 2013 Administration : Enable & Modify Continuous Crawl

SharePoint 2013 includes a new type of crawl by the name Continuous Crawl that ensures the maximum possible refreshness of SharePoint Index.

1

The Continuous Crawl has got the ability to run in parallel and does not expect any previous crawl to get completed before the current one launched.

The Continuous crawl is available only for the SharePoint Index of type SharePoint Sites.

Once started a Continuous Crawl can be Paused or Stopped or Disabled

The default craw interval for Continuous Crawl is 15 minutes but this can be set to any appropriate value.

Since we don’t have any User Interface in SharePoint 2013 to set this value so we are left with only possibility i.e. by using PowerShell.

Enable Continuous Crawl : Central Administration

  • Go to Central Admin and Click on Manage Service Applications

2

  • Click on Search Service Application

3

  • On Search Administration Page click on the Content Sources link on the left navigation

7.png

  • Select SharePoint Index that you want to enable with Continuous Crawl

5

  • On the SharePoint Index Settings Page, scroll down to Crawl Schedule section and select Enable Continuous Crawls radio button and save the settings.

6

Enable Continuous Crawl : PowerShell

$serviceApp = Get-SPEnterpriseSearchServiceApplication

$contentSource = Get-SPEnterpriseSearchCrawlContentSource -SearchApplication $serviceApp -Identity “Local SharePoint sites”

Set-SPEnterpriseSearchCrawlContentSource -Identity $contentSource -EnableContinuousCrawls $True

Modify Default Interval of Continuous Crawl : PowerShell

$serviceApp = Get-SPEnterpriseSearchServiceApplication

$serviceApp.SetProperty(“ContinuousCrawlInterval”, 5)

$serviceApp.Update()

Hope you find it helpful.

SharePoint Developer Tools – Get Your Gears

There are quite a number of Must to Have developer tools that every SharePoint Developer must have in its arsenal in order to boost its own Productivity while developing solutions on SharePoint Platform.

Few of the tools which are my personal favorites also are listed below:

CAML Designer 2013

CAML Designer can generate the CAML Query Stubs based on the inputs provided by the developer and can quickly give a handle on even complex query formations.

It is not just about the Formation of Queries but also offers code Transition from actual CAML Query to

  • Corresponding Server Side Object Model Code
  • Corresponding Managed Client Side Object Model Code
  • Corresponding JSOM & REST API Calls
  • Corresponding PowerShell Code

1

Download Path: http://biwug-web.sharepoint.com/SitePages/Caml_designer.aspx

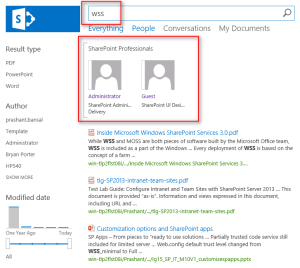
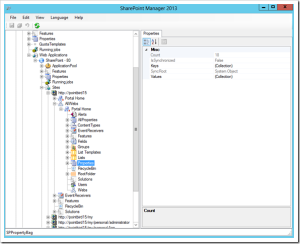
SharePoint Manager 2013

SharePoint Manager has got quite a simple and intuitive interface which allows you to quickly and easily navigate down the farm and investigate settings, properties, schema XML and so on. Most of the things in your SharePoint environment can be investigated from this tool.

This tool allows you to quickly navigate the Site Hierarchy and objects, and you can also get a quick handle on Schema of List, Fields and on object properties like Object GUIDs, Object Titles and so on.

2

Download Path: http://spm.codeplex.com
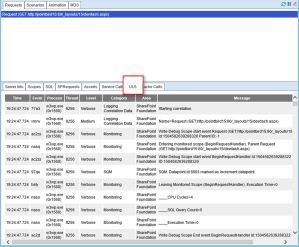
ULS Viewer

ULS Viewer allows you to look into the SharePoint ULS Logs in real time by parsing the Logs. The information (Correlation ID, Date Time Stamp, Event Source Process and so on )exposed by this tool is really useful for productive debugging capabilities.

3

With the evolution of SharePoint 2013 Developer Dashboard also includes these capabilities of reading & parsing ULS logs. Developer Dashboard contains a separate tab by the name “ULS” where we can see the ULS log entries.

4

Download Path: http://www.microsoft.com/en-in/download/details.aspx?id=44020
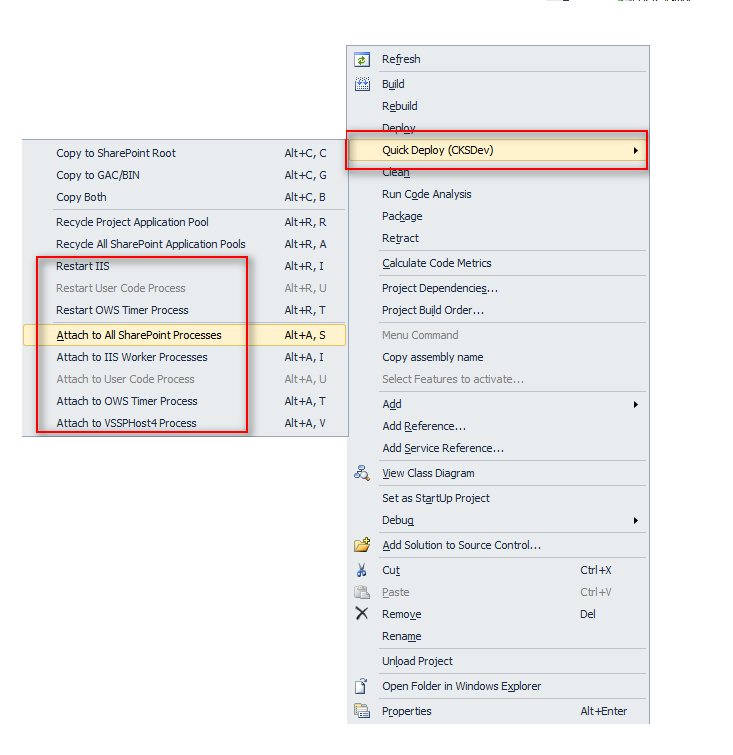
CKS Dev

CSK Dev is a Visual Studio extension which adds a bunch of new Project items for SharePoint Projects that are really helpful in increasing productivity of a developer.

Extension Project Items included

  • WCF Service SPI template
  • Contextual Web Part SPI template
  • Branding SPI Template
  • ASHX SPI template
  • Upgrade Solution Step
  • Restart IIS Step
  • Copy To SharePoint Root Step

And many more…

5

6

Download Path: http://visualstudiogallery.msdn.microsoft.com/cf1225b4-aa83-4282-b4c6-34feec8fc5ec

Color Palette Tool for Branding

Color Palette allows you create a composed looks for SharePoint 2013.

7

Download Path: http://www.microsoft.com/en-us/download/details.aspx?id=38182

SharePoint 2013 Search Tool

SharePoint Search Tool allows to you create and test SharePoint Search Keyword Query backed up by SharePoint REST API paradigm. It also allows you to analyze the Query Stats and adjust them as per the required output.

8

Download Path: http://sp2013searchtool.codeplex.com/

Fiddler

Fiddler is a Web Proxy that allows to Debug Web Traffic, do Performance Testing, HTTP/HTTPs Traffic Recording, Security Testing and so on.

The use of Fiddler becomes utmost necessary now with the evolution of SharePoint 2013 which is more focused on Development Strategies based on Client Side Scripting Technologies.

9

Download Path: http://fiddler2.com/get-fiddler

SPCAF – SharePoint Code Analysis Framework

SharePoint Code Analysis Framework helps to validate your custom SharePoint Solutions and Apps against Best Coding Practices prescribed the industry drawn by various industry standards.

This framework can be really helpful to let you verify if your custom solutions are Stable, Complying with Company Policies, Following Coding Best Practices, Well Designed and Maintainable and much more.

10

Download Path: http://www.spcaf.com

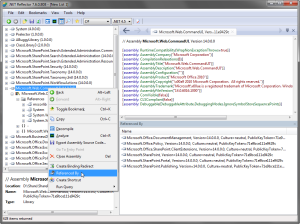
.NET Reflector from Red Gate

.Net Reflector is one of the best tools I have ever used for understanding code of Third Party DLLs for which I even did not had the Source Code.

Reflector allows you to look into the DLLs to see the code encapsulating inside it to understand its functioning.

11

Download Path: http://www.red-gate.com/products/dotnet-development/reflector/

PowerShell Tools for Visual Studio

This is an excellent Visual Studio Extensions for PowerShell which enables code intellisence for PowerShell Scripts within Visual Studio Editor.

12

Download Path: http://visualstudiogallery.msdn.microsoft.com/c9eb3ba8-0c59-4944-9a62-6eee37294597

SPFastDeploy

This tool is specially designed to enhance the productivity while working with SharePoint App.

This tool is best suited for pushing the code changes quickly to SharePoint Apps without re-deploying the Apps. This could save a significant amount of time during App Development.

13

Download Path: http://visualstudiogallery.msdn.microsoft.com/9e03d0f5-f931-4125-a5d1-7c1529554fbd

Advanced REST Client plugin for Google Chrome

This is a Chrome Plugin that allows you configure and investigate REST Queries by configuring and executing REST API Call through the tool UI. It also allows us to look for the Stats of the REST Queries in execution.

14

Download Path: https://chrome.google.com/webstore/detail/advanced-rest-client/hgmloofddffdnphfgcellkdfbfbjeloo?hl=en-US

Postman – REST Client plugin for Google Chrome

This is again a Chrome Plugin that allows you deal with REST Calls same as “Advanced REST Client plugin for Google Chrome”.

It is just a matter of choice which one you prefer to work with.

15

Download Path: https://chrome.google.com/webstore/detail/postman-rest-client/fdmmgilgnpjigdojojpjoooidkmcomcm

SharePoint 2013 Client Browser

This is the similar tool as SharePoint Manager with the only difference that it allows us to connect to SharePoint Sites Remotely using Client APIs. So now no more need to login to SharePoint Server to browser SharePoint Site Objects using this tool.

16

Download Path: https://spcb.codeplex.com/

smtp4dev

This is an awesome tool for testing SharePoint Send Mail Functionalities no matter if it is Custom or OOB functionality that we are testing.

It is used to verify if the SharePoint is sending mails to the recipients properly. This tool intercepts the mails that were sending to the recipients by SharePoint and allows you to view them in its own UI.

17

Download Path: http://smtp4dev.codeplex.com/

PowerGUI

PowerGUI is one of the best tools available for PowerShell Programming. It provides intellisence support for writing PowerShell Scripts at the same time provides lot of useful windows for Debugging purposes.

18

Download Path: http://powergui.org/downloads.jspa

SharePoint Software Factory

The SharePoint Software Factory is a Visual Studio Extension helping SharePoint Beginners, as well as experienced developers to create, manage and deploy SharePoint solutions without having to know schema internals of the SharePoint Artifacts.

19

Following is the list of few of the features offered by this extension-

20

And many more…

For a detailed list of available features you can visit : http://www.matthiaseinig.de/docs/SPSF/OutputHTML/SPSF_RECIPES_INDEX.html

Download Path: https://spsf.codeplex.com/

SharePoint Solution Deployer

SharePoint Solution Deployer helps you to deploy SharePoint solution packages (.wsp) to multiple SharePoint environments. It deploys, retracts and upgrades one or more WSPs and can be extended to perform additional custom tasks in PowerShell before or afterwards.

It provides a simple XML configuration file which allows you to define the deployment environment by using variables i.e. to perform different actions on different URLs depending to which farm you are currently deploying.

21

Download Path: https://spsd.codeplex.com/

SharePoint Diagnostic Studio 2010

Microsoft SharePoint Diagnostic Studio 2010 (SPDiag version 3.0) was created to simplify and standardize troubleshooting of Microsoft SharePoint 2010 Products, and to provide a unified view of collected data.

This tool can be used for-

  • Gathering relevant information from a farm
  • Displaying the results in a meaningful way
  • Identifying performance issues
  • Sharing or exporting the collected data
  • Providing reports for analysis

And much more…

22

Download Path: https://technet.microsoft.com/en-us/library/hh144782(v=office.14).aspx

SPServices

SPServices is a jQuery library which abstracts SharePoint’s Web Services and makes them easier to use. It also includes functions which use the various Web Service operations to provide more useful (and cool) capabilities. It works entirely client side and requires no server install.

23

Download Path: http://spservices.codeplex.com/

SharePoint LogViewer

SharePoint Log Viewer is a Windows application for reading and filtering Microsoft SharePoint ULS Logs.

It offers the following key features-

  • View multiple SharePoint log files at once
  • Search by any field
  • Filter the log by any field
  • File drag & drop support
  • Live monitoring for entire farm
  • Export filtered log entries
  • Bookmark log entries
  • Get popup notification of SharePoint log events from system tray
  • Receive email notifications on errors
  • Redirect log entries to event log
  • Supports SharePoint 2007, 2010 and 2013

24

Download Path: http://sharepointlogviewer.codeplex.com/

FxCop

FxCop is an application that analyzes managed code assemblies (code that targets the .NET Framework common language runtime) and reports information about the assemblies, such as possible design, localization, performance, and security improvements. Many of the issues concern violations of the programming and design rules set forth in the Design Guidelines, which are the Microsoft guidelines for writing robust and easily maintainable code by using the .NET Framework.

25

Download Path: https://msdn.microsoft.com/en-us/library/bb429476(v=vs.80).aspx

JavaScript Beautifier

This online tool is used to beautify, unpack or De-obfuscate JavaScript and HTML, make JSON/JSONP readable, etc.

26

Download Path: http://jsbeautifier.org/

JSON Formatter & Validator

This is an online tool to that can be used to validate the JSON Packets

27

28

Download Path: https://jsonformatter.curiousconcept.com/

Being a SharePoint Developer I can say using these tools should be the second habit for SharePoint Developers to enhance their development capabilities which results in quick delivery turn around.

Hope you all find it helpful.

SharePoint 2013: How to Create Custom Result Blocks using Query Rules

In this article we are going to explore SharePoint Search Custom Result Blocks configured using Query Rules.

What are Results Block?

A Result Block is set of filtered results that are combined with core search results and displayed on top of the core search results as a block or can be ranked with in the Core Search Results depending on how you configure it to be.

It is not required to have results for Result Blocks from Local Search index only. A Result Block can use any of the result source from the below list:

  1. Local SharePoint farm
  2. Remote SharePoint farm
  3. OpenSearch
  4. Exchange

In order to setup this demo, I have prepared the system with some test User Profile data as described below:

I have setup three User Profiles with different job titles as shown below:

User 1 : SP\Administrator

1

User 2 : SP\Guest

2

User 3 : SP\SPDeveloper

3

In order to configure Result Block, we need to start it with Query Rules configuration by using the following steps:

Go To Site Settings

4

Under Search, Click Query Rules

5

Choose Result Source as applicable, here I am working on Local SharePoint Search Results

Click on New Query Rule

6

Under General Information, Enter Rule Name

Under Query Conditions,

  1. Select Query Options as needed, here Advanced Query Text Match works for me
  2. Select phrases which you want to be included while matching query text issued by the user

7

Click on Add Result Block

8

Enter Block Title, this title will be added as Header with the Result Block displayed on Search Result Page.

Click on “Launch Query Builder” Button

Select the number of items to be displayed inside the result block from Items Dropdown as shown below, here I will go with 4 items to be displayed inside Result Block.

9

Configure the Query as shown below:

  1. Select a Result Source to as target for the query, here I am using “Local People Results” as I have setup test data in User Profiles.
  2. Choose suitable property to filter on from Property Filter Drop Down
  3. Choose suitable Operator
  4. Choose suitable value type
  5. Choose suitable value as shown below
  6. Click on Add property Filter
  7. This will add the query filter to the Query Text box
  8. Click on the Test Query Button, to validate the query you have just created
  9. Search Result Preview Section will show few of the total search results returned by the query just configured in the previous steps
  10. Click OK to close Query Builder Dialog

10

Always Choose the setting as shown below, if you want to have Result Block Displayed on top of Core Search Results as a separate block.

You can also choose to display “More” Items link, in case you want to show case the complete result set retuned based on the Query Rule. For this to happen you have to have a separate page configured with the same query to show all the results. I am choosing here not to display it.

11

And That’s it.

We are all done with the configuration work for the result block and now it is time to test the results returned based on the configuration we did above.

Final Configuration would look like as shown below:

12

In order to test the scenario, Enter “MOSS” or “sps” or “wss” as Search Term, remember we added “MOSS, sps, wss”in the search phrases while configuring Query Rules.

Since we got the search term “MOSS” or “sps” or “wss” as a Query issued by user, SharePoint Search System identifies a suitable query rule by matching this term with the phrases we specified while configuring Query Rules above and filter out the results based on the query we specified, in this case it was “JobTitle:SharePoint”, which mean finds any Profiles for which Job Title Property contains the word “SharePoint” .

Based on the query treatment as mentioned above we got two profiles “User 1 : SP\Administrator” with Job Title “SharePoint Administrator” and “User 2 : SP\Guest” with Job Title “SharePoint UI Designer”, displayed as valid results inside Results Block.

On the other hand we do not get “User 3 : SP\SPDeveloper” listed in the Result Block as Job Title Property for this profile is blank, due to this “JobTitle:SharePoint” match gets failed and this result get filtered out as shown below.

13

14

15

Hope this will help someone in need…

SharePoint 2013 : Promoted Search Results

In this post we will explore another cool SharePoint Search Feature commonly known as “Promoted Results”.

Before diving deep into implementation details, let’s have some background on this new cool feature of SharePoint 2013 Search.

What are Promoted Results?

Since the SharePoint 2013 Search System is built up from scratch by absorbing all great features from its predecessors, one of such features is known as “Best Bets” in SharePoint 2010 Enterprise Search, “Visual Best Bets” if we are using Fast Search and now “Promoted Results” in SharePoint 2013 Search Environment.

Promoted Results are triggered by one or the other conditions specified while defining the Promoted Results as we will see next in this post.

In order to define the Promoted Results we will proceed as follows:

Go to “Site Settings -> Query Rules” as shown below:

1

2

On Manage Query Rules Page, Select the appropriate Result Source suited to your needs, then click “New Query Rule” Link as shown below:

3

On the “Add Query Rule” Page

  1. Specify the Rule Name
  2. Specify Query Conditions

Please note the Keyword “SharePoint” that we specified in the below configuration, this will ensure that whenever Search Query contains the Keyword “SharePoint” this Promotion will be served as a part of the search results retuned as a response to this query.

4

Then click on “Add Promoted Results” Link

5

On the “Add Promoted Result” Page,

  1. Specify the Title : Any Valid Title
  2. Specify the URL: Any valid URL of the .aspx Page with valid HTML inside it.

Check the “Render the URL as banner instead of as a hyperlink” checkbox, this will ensure that Promotional Content will be displayed in HTML View instead as a hyperlink.
Click Save to save the changes.

6

Under the “Publishing” Section,

  1. Select “Is Active” Checkbox to enable this Timeline Driven Promotion.
  2. Specify “Start Date” & “End Date” to specify the Timelines for this Promotion to be visible on top of the search results.

7

And that’s it with the Configuration of New “Promoted Result”.

Final configurations would look like as shown below:

8

Now it is the time to Test the “Promoted Result”.

Visit Global Search Center Site and specify the Keyword “SharePoint” as query as shown below.

And sure enough we will get the Promotional Result at the very top of the search results.

9

So we can see how easy is to implement Promoted Results in SharePoint 2013.

Hope this will help someone in need…

SharePoint 2013: How to Develop Custom Content Enrichment Service

In this article we are going to explore one of the Advanced Features of new SharePoint 2013 Search Architecture.

With the evolution of new SharePoint 2013 Search Architecture, SharePoint allows developers to intercept the Content Source Crawl Engine Processing by adding a Custom Step in the Content Processing Mechanism.

If we closely monitor the Content Processing Mechanism, we can identify easily the step where we can hook up the Custom Content Enrichment Service for supporting and extending Content Enrichment process.

1.1

Under the hood, this Custom Content Enrichment Service is implementing an interface “IContentProcessingEnrichmentService”, which is having method that can deal with the incoming Items.

We can utilize Custom Content Enrichment Service in the following scenarios:

  1. If need to push new Managed Properties based on the Content Source being Crawled
  2. If need to push new Managed Properties based on existing Managed Properties associated with the Content Source being Crawled.
  3. If we need to normalize the Managed Properties values when we are dealing with Heterogeneous Content Sources.

So in this walkthrough we will see Scenario 2 where we can push new Managed Properties based on values present in existing properties.

In order to setup the test scenario we need a List with two columns “DemoCompany” and “DemoCompanySymbol” as shown below:

2

Once we got the list ready with columns and data, we have to initiate a full crawl so that the respective Crawled Properties based on these columns are created by the crawling process.

3

4

Now once we are done with setting up the content source, next thing is to create Managed Properties we are going to employ in this demo.

We have two types of Managed Properties which we should consider in this Demo:

  1. Input Properties: These are the Properties which will be supplied to the Custom Content Enrichment Service as Input.

In this case we have DemoCompany, DemoCompanySymbol as Input Properties.

  1. Output Properties: These are the Properties which will be returned back to SharePoint Crawl from Custom Content Enrichment Service after the Properties are nourished with updated data.

In this case we have DemoCompanyWithSymbol as Output Properties.

Only Input properties must be mapped with the respective crawled properties and Output properties must remain unmapped as they will be updated by the Custom Content Enrichment Service.

Also all these properties should be marked as “Queryable”,”Searchable”,” Retrievable” shown below:

5

Also pay attention on the Data Type of these properties, as this information will be needed at the time of retrieving their values in our Custom Content Enrichment Service.

With this we are all done with Content Source Definition, Managed Metadata Properties Configuration.

Now the next thing is to start with the Development of Custom Content Enrichment Service as shown below:

  1. Launch Visual Studio
  2. Create a new Project of type “WCF Service Application”

6

7

Add a reference to “microsoft.office.server.search.contentprocessingenrichment.dll” which can be located at “C:\Program Files\Microsoft Office Servers\15.0\Search\Applications\External”

8

9

10

Add following using statement to your service class:

11

In order to understand the working of this code let’s run Code DNA Test as mention below:

12

  1. Inherit the Service Class with the interface IContentProcessingEnrichmentService
  2. Preparing a variable processedItemHolder of type ProcessedItem to hold the incoming item after processing.
  3. Implement ProcessItem(Item item) Method of IContentProcessingEnrichmentService Interface to deal with incoming Item.
  4. Defining OutPut Managed Property as “DemoCompanyWithSymbol” which we need to create before start writing the code for this service as we have already done above.
  5. Retrieving Input Property DemoCompany, by type casting it as per the Data Type of the Managed Property, like in this case we have a Text type Managed Property so the we are using Type Casting as Property<string>.
  6. Retrieving Input Property DemoCompanySymbol, by type casting it as per the Data Type of the Managed Property, like in this case we have a Text type Managed Property so the we are using Type Casting as Property<string>.
  7. Add the new Property to existing set of properties by using ItemProperties.Add(demoCompanyWithSymbol)
  8. Then finally return the item back to the Crawler for indexing with new set of properties.

In this case we have initialized the “DemoCompanyWithSymbol” Managed Property with the combination of DemoCompany and DemoCompanySymbol properties as

demoCompanyWithSymbol.Value = string.Format(“Company {0} has a symbol {1}.”, companyProperty.Value.First(), symbolProperty.Value);

Once we are done with the code, hit F5 to run the Custom Content Enrichment Service in Debug Mode, so that we can test the logic and debug the issues if we get any.

As soon as you hit F5 you will get a WCF Test Client Application Launches, on this application page copy the URL of the service as shown below:

13

Paste it in the Browser to validate if it is running fine.

14

Ok now when we have got our Custom Content Enrichment Service up and running we can let SharePoint know about this service.

This Service Extension can be registered with SharePoint using PowerShell as shown below:

15

And in case you need to remove this registration later on you can use the following PowerShell command:

19

16

Now once the registration is done, we need to initiate the Full Crawl in order to re-process all the Crawled Items as per the logic written in the Custom Content Enrichment Service.

This is the time when you can put break point in your code and expect it to hit when the Full Crawl sends the first and any subsequent item to Custom Content Enrichment Service for Processing.

At this time you can intercept the code execution to inspect the incoming Items.

17

Once full crawl is done, execute the Search Query directly in browser to see if the new Property DemoCompanyWithSymbol contains the value provided by our Custom Content Enrichment Service.

We can build the search query shown below:

http://<Server Name>/_api/search/query?querytext=’DemoCompanySymbol:DC01110’&selectproperties=’DemoCompany,DemoCompanySymbol,DemoCompanyWithSymbol’&sourceid='<Result Source ID>

Execute the Query and analyze the response to see for DemoCompanyWithSymbol property and sure enough we should get the DemoCompanyWithSymbol property updated with new values as shown below:

18

This implementation could be really effective in cases where we are dealing with Heterogeneous Content Sources or where we are lacking with lesser amount of Metadata information than expected.

Hope this will help someone in need…

SharePoint 2013 : Execute SharePoint Search Queries using CSOM

In this article we will explore the method of executing Search Queries using SharePoint Client Side Object Model. The code sample used in this article can be used in any kind of solution (Farm, Sandbox) or any kind of App (SharePoint Hosted, Cloud Hosted) executing in context of SharePoint.

Prerequisites:

  1. Fiddler Web Proxy should be installed. You can get Fiddler from http://www.telerik.com/download/fiddler

Like in other of the earlier articles we will start with creating new SharePoint Hosted App.

1

The next thing is to provide a simple UI for our implementation which allows the users to specify the Search Terms & execute the queries.

In order to keep the story simple we will take one input box to specify the Search Terms & one button to execute the query as shown below.

2 3

Now once we are done with the UI of the App, the next thing is to prepare a module that will execute the Search Queries and receive the response.

4

Following is the detail inspection of the above code snippet

  1. Initialize SharePoint Context variable (Step 1) then we need to
  2. Initialize the Query Object (Step 2) using the context variable created in Step 1.
  3. Set the Query Text (Step 3). This query text has been specified in the input box by the user executing the query.
  4. Initialize the Search Executor Object (Step 4) using the context variable created in Step 1. This object is solely responsible to execute Search Queries. This object contains a method “executeQuery” which takes query text as its parameter.

Now the next challenge is to identify how to code the next step, as it is dependent on response coming from the SharePoint REST End Point in return of the request executed in Step 4.

So the trick to first reviews the response coming from SharePoint using any Web Proxy. Being a big fan of Fiddler I must insist to make use of it to the purpose.

Below image is showing some sample data present in one of the lists called “Customer”.

5

For the sake of demo let’s pick “ALFKI” as Search Term. On clicking the “Executing Search using CSOM” , the Search Query gets issued to SharePoint End Point and if it is a success we will get the response for sure.

6

If we investigate the response in Fiddler we can see the data structure returned as a part of the response.

7

Based on this observation, we can read the data as shown in Step 5 above.

Once we receive the search results, it is just the matter of choice on how to display it. For the sake of this demo I am just displaying the search results in a div already added to the App UI.

8

And that’s it. We are all done here.

Though the scenario I mentioned here is quite simple, but the presence of Client Side Search APIs in SharePoint 2013 is proved to be very powerful and could be utilized to cater complex business requirements without using any custom code.

Hope this will help someone in need…


SharePoint 2013 : How to Create Custom Intent Based Results Blocks Using Query Rules

In this post we will explore a new mechanism of Searching data based on Custom User Intents and serve them as Result Blocks on top of the Search Results.

What is Custom User Intent?

Custom User Intent means matching a Search Term specified by the end user with the Phrases defined using Query Rules. For example, PowerPoint Slides are also known as Decks. So if the business user specified a Search Term as “SharePoint Deck”, it was really intended to search all the PowerPoint Slides which contains “SharePoint” as shown in the image below.

1

Hope the above example suffices to clarify the Custom User Intent.

Business Scenario

For the sake of this demo, I have setup an imaginary scenario, where in my organization business users refer all types of videos as “Small Medium Sized Video” or “SMV”. As the matter of habit all users make use of keyword “SMV” in order to search for video files in SharePoint System.

In order to implement the Custom User Intent based on above scenario we have to follow the below steps:

  • Go To “Site Settings”

2

  • Under “Search” section Click on “Query Rules”

3

  • Create & Configure Query Rule
  1. Select the required “Result Source”, in our case we can go with “Local SharePoint Search Results”.
  2. Click on “New Query Rule” in order to create a new Query Rule.
  3. Specify rule name as “Custom Video Intent”
  4. Under “Query Conditions” “Query Contains Action Term” and specify the phrases you want to match to identify the User Intent, like we specified as “smv;smvs”.
  5. Click on “Add Result Block” to specify the query based on which Result Block will be rendered.

4

5

6

  • Configure Result Block
  1. Specify the “Block Title” as shown below
  2. Click on “Launch Query Builder” button to configure the query

7

  • Configure query
  1. Select result source “Local Video Results”
  2. Click on “Test Query” button to test the query based result source selected in Step 1
  3. “Search Result Preview” Section on the right will show the results returned as a part of the query specified earlier.
  4. Click “OK” to save the Query Changes.

8

  • Configure Display Template

Choose suitable Display Template from “Item Display Template” dropdown list.

9

10

And that’s it. We are all done with our new Query Rule defining Custom User Intent.


11

Now it is time to see the Query Rule in Action. In order to test it go to Search Center and enter “SharePoint smv” as search term and click Search Icon. You will see the Search Results Block “Video Results for SharePoint” containing items which contains “SharePoint” in their Title or Description.

12

Hope this will help someone in need…

SharePoint 2013: How To Create Custom Display Templates For SharePoint Search

What are Display Templates?

Display Template is a new technique introduced in SharePoint 2013 in order to modify the look and feel of the search results by making use of HTML & JavaScript instead of XSLT modifications as we did in the earlier versions.

With this new rendering technique or rather framework, SharePoint offers some of the most compelling advantages as mentioned below:

  1. Display Templates Support HTML & JavaScript instead of XSLT (which is often quite cumbersome to work with).
  2. Display Templates based configurations supports a broader scope of execution than XSLT based configurations. (As Display Templates should be defined at Site or Site Collection Scope while XSLT based Templates could only be defined at the WebPart Scope).
  3. Display Template applies Per Item Basis and not Per Result Set Basis (Provides us with the Context of the Current Item which is under execution, so that we can make use of any Managed Metadata Property associated with the Search Result Item and render it as per needs)
  4. As the Display Templates are scoped to Site or Site Collection, they can be used for all kind of results, can be used with in Content Search Web Part, Refiners and so on.

I recommend you to follow this MSDN Article on Display Templates to get an in depth understanding on the topic.

By now we got a fairly good Idea on “What are Display Templates?” and now it is time to see them in action.

Business Scenario:

  1. Additional User Profile Property should be added to User Profile Page which will hold the User’s LinkedIn Profile URL.
  2. There should be a provision to adjust the display position of this Property in Core Search Result Web Part.

Prerequisites:

  1. User Profile Service should be up and running
  2. User Profile Synchronization should be configured
  3. Search Service Application Instance should be configured appropriately
  4. Search Center Site Collection should be configured appropriately

In order to see Display Templates in Action, we need to perform following steps:

  1. Create User Profile Property
  2. Start Full Crawl of Content Source for the User Profiles
  3. Create, Map and Configure Managed Property
  4. Start Full Crawl of Content Source for the User Profiles
  5. Create Display Template
  6. Create Result Type with Custom Display Template
  7. Test Display Template

Create User Profile Property

Go To Central Admin >> Manage Service Applications

1

Click on User Profile Service Application

2

Click on Manage User Properties

3

Click on New Property

4

Enter Name, Display Name, Type & Length for the User Property as needed.

5

Make sure Default Privacy Setting must be set to Everyone

6

Make sure Indexed must be selected under Search Settings Section, else this property will be skipped by Search Crawler and it won’t be available to use later.

7

Once done with it click OK to add the User Property

8

Once added you can find the new property under Custom Properties Section

9

Go to Manage User Profiles

10

Find the required User Profiles and Edit their Profiles by selecting Edit My Profile from ECB Menu

11

On the User Profile Page, locate the LinkedIn Profile Property

Enter the URL to LinkedIn Profile of the User and Save the User Profile Properties

12

13

With this we are all done with the Creation of User Profile Property.

Start Full Crawl of Content Source for the User Profiles

Now in order to generate the Crawled Property corresponding to the User Profile Property we need to run the Full Crawl on the People Content Source

Go to Search Service Application

14

Click on Content Sources

15

Click on People Search and select Start Full Crawl from ECB

16

Wait till the Crawl Status become Idle

Create, Map and Configure Managed Property

Go to Search Schema

17

Click on Crawled Properties Link

18

We should verify if the Crawl Property corresponding to our User Profile Property has been created successfully or not

Find the Crawled Property by entering Search Term in Crawled Properties Textbox and click on the Image button with Green Arrow image.

Make sure you should be able to see the Crawled Property which is created during the Full Crawl Process as shown below

19

New we need to create a new Managed Property and Map it with the crawled property shown in earlier step

Click on Managed Properties Link

Click on New Managed Property Link

20

Enter Name, Description, Data Type for the Managed Property

21

Select Searchable, Queryable, Retrievable, Sortable, Refinable and Safe as appropriate

22

23

Click on Add Mapping Button

24

On the Crawled Property Selection Screen

  1. Enter Property Name
  2. Click Find Button
  3. Select appropriate Crawled Property
  4. Click OK

25

Save the Managed Property Definition

26

In order to verify newly Created Managed Property

  1. Enter Property Name
  2. Click Image Button

You should be able to see Managed Property with all the settings you specified earlier.

27

With this we are done with the creation of require Managed Property corresponding to the Crawled Property

Start Full Crawl of Content Source for the User Profiles

Now in order to fill the Managed property with the value stored with in Crawled Property based on the mapping, we need to run the Full Crawl again as we did before.

28

Create Display Template

Once we are done with the Creation and Configuration of required Managed Property, it is time now to create a new Display Template which will include this Managed Property

We need to launch Design Manager from the Standard Menu as shown below

29

Click on Upload Design Files

30

Click on Location URL as shown below

31

Click on Display Templates Folder

32

Click on Search Folder

33

Since we need to modify the template for People Search Results, we need to modify the template Item_Person

34

Point of Caution: As a part of recommended SharePoint Practices, we should never edit and existing template, instead we should make a copy of it, rename it and then modify it as per our needs.

35

Open the Item_Person_LinkedIn Template file and make the following modifications

  1. Change the Title
  2. Added the Managed Property we created in earlier steps

36

Now you need to decide where exactly you want to place this Managed Property within the Display Template.

In our case I am going to place this below User Name

Find the Html Tag NameValue

Below this tag add the following code as shown below

  1. Check if LinkedInProfileUrl Managed Property is not Empty
  2. Add HTML snippet to display the value stored in LinkedInProfileUrl Managed Property
  3. Close the IF block

37

Save the file and copy it back to the same location

38

SharePoint generates a JS File corresponding to this HTML file automatically, and the JS file should not be modified by the users. This JS file will be maintained and modified by SharePoint system automatically based on the changes you have made in HTML File.

39

With this we are done with the development of new Display Template.

Create Result Type with Custom Display Template

Now the next step is to create a new Result Type, which will be using our new Display Template to display the Search Results

Go to Site Settings

40

Click on Result Types

41

Click on New Result Type

42

  1. Provide Name to the Result Type
  2. Select Result Source
  3. Select Display Template (the one we have just created)
  4. Save Result Type

43

44

We can see the newly created Result Type on Manage Result Type Page as shown below

45

With this we are all done with development of new Display Template, it is time to test it now.

Test Display Template

Search for the Users and sure enough you will find the new Property appears only for those User Profiles which contains a non-empty value for LinkedIn URL Property.

46

From the above walkthrough we can conclude the fact that Display Templates are simple but really powerfull mode of customizing Search Result Page as per custom needs.

Hope this help someone in need…

SharePoint 2013: How To Create Custom Search Verticals

What are Search Verticals:

In SharePoint 2013 Search Vertical are displayed in the Search Navigation Web Part on Search Center. SharePoint 2013 Provides us four Search Verticals OOTB namely Everything, People, Conversation, Videos. Each of these verticals mapped to a specific page to display the results returned by the queries and when Search Users click on any of these verticals they are navigating to the respective mapped pages with the vertical they clicked on.

3

For example: Search Vertical Everything uses Results.aspx page to display the results returned by the query. In the similar fashion People vertical uses PeopleResults.aspx, Conversation vertical uses ConversationResults.aspx, Video vertical uses VideoResults.aspx.

All these pages used by the different Search Verticals can be located under Page Library on Search Center Site

1

Each of these vertical pages uses following four Web Parts to render results returned by the user queries:

  1. Refinement Web Part
  2. Search Box Web Part
  3. Search Navigation Web Part
  4. Search Results Web Part

2

I hope by now you got a fairly good idea on “What are Search Verticals?”

In this article we are going to create new Search Vertical for our Search Center that will be showing all the documents (Only Documents) Authored or Co-Authored by me.

Business Scenario:

  1. Search must be able to show all the documents Authored or Co-Authored by me
  2. All the search results must be shown under different vertical on the Search Center
  3. Only documents must be included in the search results

Prerequisites:

  1. Search Service Application Instance must be created and configured
  2. Content Sources must be created as required
  3. Full Crawl must be executed once at least on each of the Content Source
  4. Search Center Site must be created & configured as required

On the similar lines we can create our own Search Verticals.

We need to perform following steps to get a new Search Vertical Up and Running.

  1. Create Result Sources (One per vertical)
  2. Create new Search Vertical page to display results
  3. Configure Search Navigation

We will start our journey by creating the required Result Source for the new search vertical

Go to Site Settings

4

Go to Search >> Result Sources

5

Create new Result Source by clicking New Result Source link

6

Enter Name and Description.

Choose Local SharePoint as Protocol

Click in Launch Query Builder Button to launch Query Builder screen where we can specify the relevant query for the Result Source

7

8

Choose Property Filter as needed, based on the business scenario we have we will choose Property Filter as Author and Value as Name of the user who run the query then Property Filter as IsDocument and Value as 1.

Setting IsDocument Property Filter to 1 is a must if you want to display only documents as the part of the search results for this newly created vertical.

9

Click Add property filter Button to add the properties to the Query Text.

Once we are done with configuring the Query we need to test the Query by clicking Test Query Button

Search Result Preview Panel on the left will display all the results returned by the query we just configured.

10

Click OK

11

With this we are done with the creation of Result Source for the new Search Vertical

Now we will create new Search Vertical Page to display results retuned by the Result Source that we have just created.

Go to Site Contents

12

Go to Pages Library

13

Click new item or Go to Files Tab >> New Document

Choose Page Template to create a new Search Page

14

15

Once the page is added, Edit the page

16

Locate Search Results Web Part and edit its properties

17

18

In Web Part Properties click on Change Query Button to launch a query builder

19

Choose My Documents Result Source from Select a query Dropdown box

20

Click Test Query Button to test the query translated by the Result Source selected under Select a query

Search Result Preview Panel on the left will display all the results returned by the query we just configured.

With this we are done with creation a new Search Result Page.

It is time now to Configure Search Navigation to include new Search Vertical on the Search Center

Go to Site Settings

Go to Search >> Search Settings

21

Click on Add Link under Configure Search Navigation

22

Enter Title as My Documents

Click on Browse Button

23

Select MyDocuments.aspx Page from Page Library

24

Click OK

This will create a new Search Vertical on the Search Center with name My Documents.

25

26

Finally we need to test this new Search Vertical.

Currently I am logged in as sp\spdeveloper

Go to Search Center

Enter Search Query in our case which is *.pdf to return all the documents with the extension .pdf.

Everything Search Vertical will show all the PDF documents returned by the query

27

But My Document Search Vertical will show only those PDF documents which are Authored or Co-Authored by me

28

29

Creating new Search Verticals can be helpful in the scenarios where business user needs to filter out the results returned by the queries under different names by limiting the results based on the Result Sources.

Hope this will help someone in need.

Sharepoint 2013: How To Develop Custom Search Refiners

There could be scenarios where we need to have additional Search Refiners apart from the refiners provided by SharePoint OOTB.

Business Scenario:

In this article we are going to take care of a scenario where :

  1.  We need to add one additional property to the User’s Profile with the name “Last Company”. This property will contain the name of the User’s Previous Organization.
  2.  This property must be mapped with one of the Term Sets created in Managed Term Store.
  3.  This property must be available as an additional Refiner for the People Search

Prerequisites:

  1. Managed Metadata Service Application Instance must be created & configured.
  2.  User Profile Service Application Instance must be created & configured.
  3.  Search Service Application Instance must be created & configured.
  4.  Content Source must be created for User Profiles. Full crawl must be executed once.
  5. Search Center Site Collection must be created.

Now let’s see Custom Refiners in action.

Go to Central Administration = > Manage Service Application

1
Select Managed Metadata Service Application Instance.

2

SharePoint provides three Terms Sets Department, Job Title, Location which is available OOTB and mapped to User Profile Properties.

3

Now let’s create a new Term Group “Companies”.

Under “Companies” create a new Term Set “My Past Companies”.

Under “My Past Companies” create new Terms as shown below. Each term should represent a single company that can be selected from within User’s Property Page using “Terms Picker”.

4

With this we are done with the Managed Term Store Configuration.

Now it is time to create a new User Property “Last Company” which is mapped to the Term Set “My Past Companies”.

Go to Central Administration = > Manage Service Application

Select User Profile Service Application Instance

5

Go to “Manage User Properties”

6

Click “New Property”

7

Enter Name, Display Name, Type and Choose Term Set as shown below:

8

Scroll down and make sure “Default Privacy Settings” must be set to “Everyone” else Search Crawler won’t be able to crawl this property.

9

Click OK.

This will create a new User Property under Custom Property Section as shown below.

10

Now go to “Manage User Profiles” to modify the User Property Page for the User.

11

Find the User and Edit its profile by selecting “Edit My Profile” from ECB as shown below

12

Scroll down and locate the “Last Company” property.

Enter the company name using “Term Picker” as shown below

13

14

Save and Close the User Property Page by clicking the “Save an Close” button.

15

With this we are all done with the creation and configuration of the Custom User Property.

Now it is time to trigger the Crawl on User Profiles so that this new property gets crawled and available for the search queries.

Go to Central Administration = > Manage Service Application

Select Search Service Application Instance

16

Click on “Content Sources” to open “Manage Content Sources” Page

17

Choose “People Search” Content Source and click “Start Full Crawl” using ECB as shown below:

18

Wait till the Crawl Status is “Idle”.

19

Go to Search Center and Click on “People” Vertical.

Enter Search Term and Click Find Icon

As soon as the Search Results appear we can notice a new Refiner “Last Company” available on the Refiner Panel as shown below:

20

We can easily refine the incoming results by using “Last Company” Refiner as shown below:

21

By this simple walkthrough we can conclude that the capability of creating new Refiners is quite powerful and gives us enormous power to create different kind of refiners based on the incoming result sets.

Hope this will help someone in need…