SharePoint 2016: How To Implement Alternate Access Mapping

In this article we will discuss implementing “Alternate Access Mapping” or commonly known as “AAM” in SharePoint 2016.

Alternate Access Mapping Architecture

If you are not aware of AAM or you have some misconceptions about it, I would highly recommend you to read through an excellent blog Alternate Access Mappings (AAMs) *Explained by “Brain Pendergrass” from Microsoft and would like to thank him for such an awesome blog to make me understand this concept in depth.

This article will focus on guided steps to configure AAM in SharePoint 2016 and we won’t discuss AAM as a concept.

Create New Web Application

Step 1: To start the demo let go to SharePoint Central Admin Site and click on “Manage Web Applications” as shown below-

1

I am creating a new Web Application for demo purpose. In real environments we can use any existing Web Application to perform these steps.

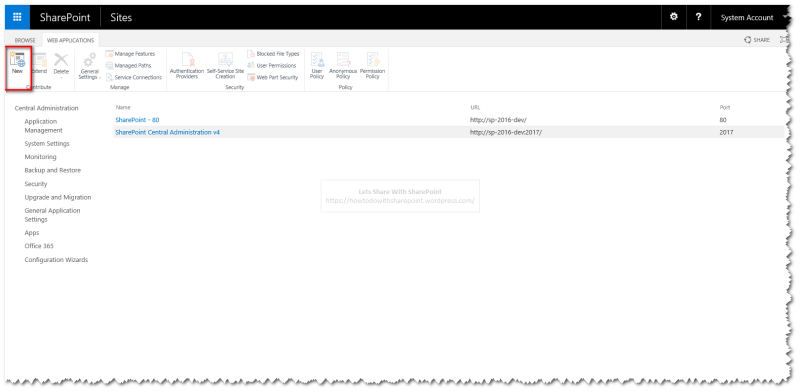
Step 2: Click “New” menu to launch “Create New Web Application” wizard
2

Step 3: Enter Web Application Name and other necessary information

3

Once done click OK to start the process

4.0

When the creation process has been completed then we can see a new Web Application listed in the list of Web Applications

4.1

Also we may see the Modal Dialog that offers quick link to create new Site Collection for this Web Application

4.2

Create New Site Collection

Step 4: Click on “Create Site Collection” link to create new Site Collection for the Web Application.

Select Web Application

5

Enter Title, URLs, Template, Primary Site Collection Administrator

6

Click “OK” to start the process

7

Once process has been completed we can see new Site Collection created for the Web Application
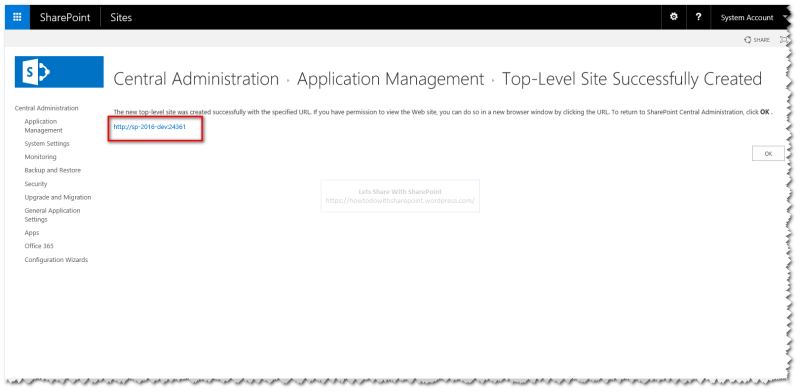
9

We can navigate to the site collection by clicking the URL
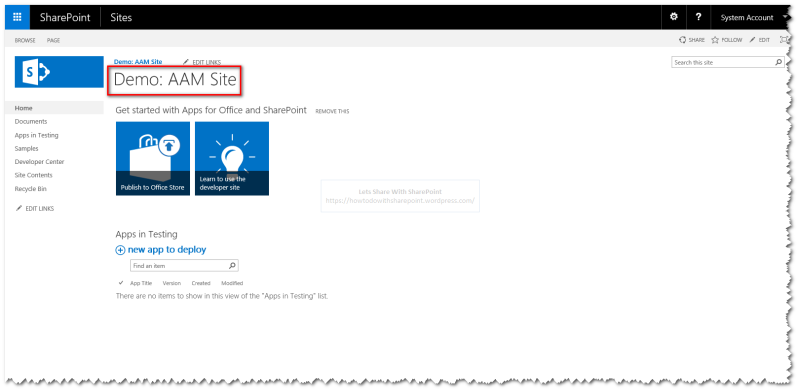
10

Add DNS Entries

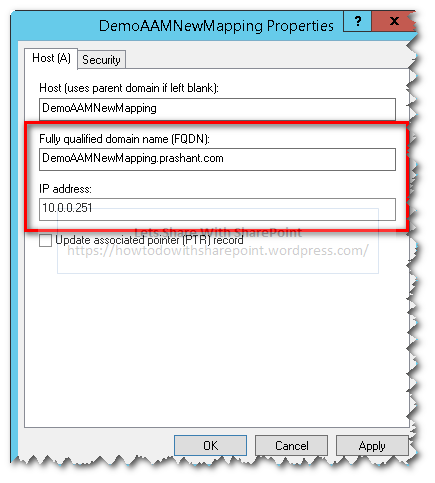
Step 5:  Now we have configure add host entries to DNS.

Search for DNS

11

Add new Host Entry to the “Forward Lookup Zone” as shown below-

12

In New Host screen, enter Host Name, Select FQDN, enter IP Address. Once done click “Add Host”

13

If operation completed successfully we can see popup window show success message
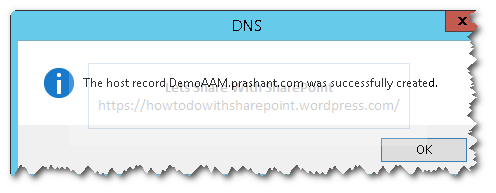
14

We can see this new Host added to the existing list

15

Add/Update IIS Bindings

Step 6: Add “IIS” Bindings

Now we have to add IIS bindings for the new Host. Search for “IIS” and select “Internet Information Services (IIS) Manager”

16

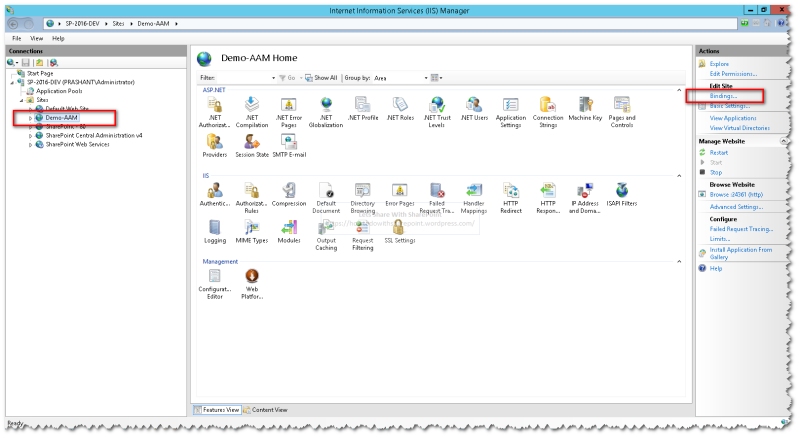
Select the Web Application that we have created in above steps from the “Connections” Panel on the left under “Sites” node

Click on “Bindings…” on the right to Add/Edit Web Application Bindings

17

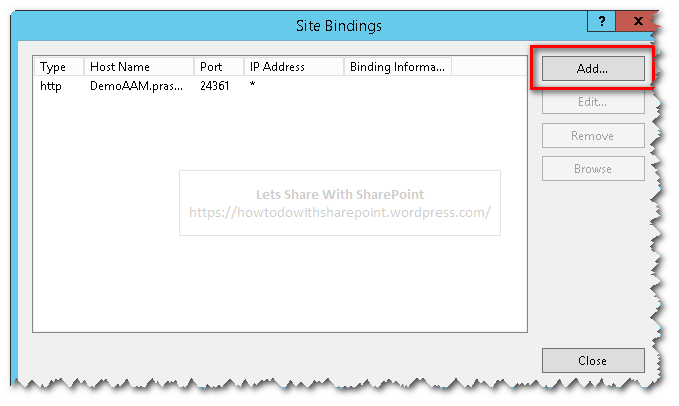
In the “Site Bindings” screen select the default binding and click “Edit”

18

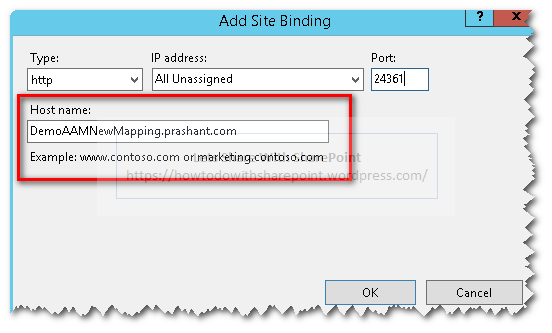
In the “Edit Site Binding” screen enter Host Name value and this should match the entry that we have created earlier in DNS

Click OK

19

Once saved the existing binding will look like as shown below-

20

Configure Alternate Access Mappings Using Central Admin

Step 7: Configure Alternate Access Mappings (From Central Admin)

Go To Central Admin -> “Application Management”

Under Web Applications Click “Configure alternate access mappings”

21

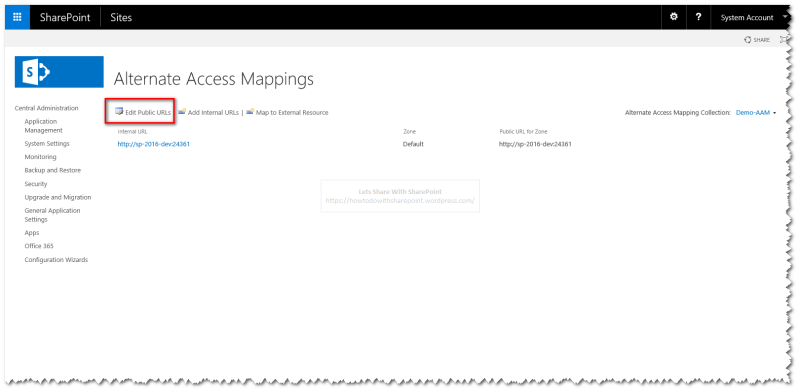
Click “Edit Public URLs”

22

In the “Edit Public Zone URLs” Screen and enter “Default Zone” URL with “Host Name” configured earlier as shown below.

Click “Save” once you entered the default Zone URL to save the data.

23

Now try accessing SharePoint Web Application using Public Zone URL and if the configuration goes well, the access will be granted to you

Test Alternate Access Mappings

2425

Configure Another Mapping

Step 8: Repeat Step 5 to add another DNS entry to add a new Host Name

262728

Step 9: Repeat Step 6 to Add Web Application Bindings

2930313233

Configure Alternate Access Mappings Using PowerShell

Step 10: Configure Alternate Access Mappings (Using PowerShell)

Now we will add this new Host Name to the default zone for the web application

Launch SharePoint 2016 Management Shell

34

“New-SPAlternateURL” cmdlet gives us option to add new Alternate URLs to the required zone for web application

This cmdlet take following parameters

  • New Alternate URL – URL that you need to register as alternate URL
  • Web Application Path – URL that represent Web Application
  • Zone – Represents a zone that you need this alternate URL to add to

35.0

Once this command executes successfully we can a new Alternate Access Mapping added to the list

35.1

Test Alternate Access Mapping

Now if try to access this web application using this new mapping it still be translated to the same Public URL for the Web Application.

3637

By following above steps we can enable a web application that receives the request from an internal URL in one of the five authenticated zones to return pages that contain links to the public URL for the zone

Hope you find it helpful.

SharePoint 2016: How to configure Usage & Health Service Application using PowerShell

Usage & Health Service Application is one of the most important Service Applications that provides vital information on the Health & State of SharePoint Farm.

In SharePoint 2016, Usage Service is collecting information on Timer Service Monitoring, Event Logs, Performance Counters, Search Usage, Sandbox Usage, and Site Collection Usage and much more.

This Service application is responsible to keep monitoring the resource, health & state associated with the SharePoint Farm and logs this information to Log Files on SharePoint Hive or any designated path along with SharePoint Logging Database “WSS_Logging” in SQL Server Database.

Many other components in SharePoint like Developer Dashboard, Search Analytics, Web Analytics Reports are using this data to provide logical User Interface for the end users.

You will get empty reports in Web Analytics reports section, if usage and health data collection service application is not configured properly.

It is not possible to Provision Usage & Health Service using Central Admin, as there is no User Interface available.

Let us first get into Central Admin Site to see if there is options available on the User Interface to provision Usage Service

Go to “Central Admin” – > “Manage Service Applications”

2

Click on “New” Menu on the Ribbon and in the existing list of available Service Application Templates we can see there is no template available for provisioning “Usage & Health Service Application”

3

This concludes that we have to provision Usage Service using PowerShell as shown in the following steps-

1

Launch “SharePoint 2016 Management Shell”

4

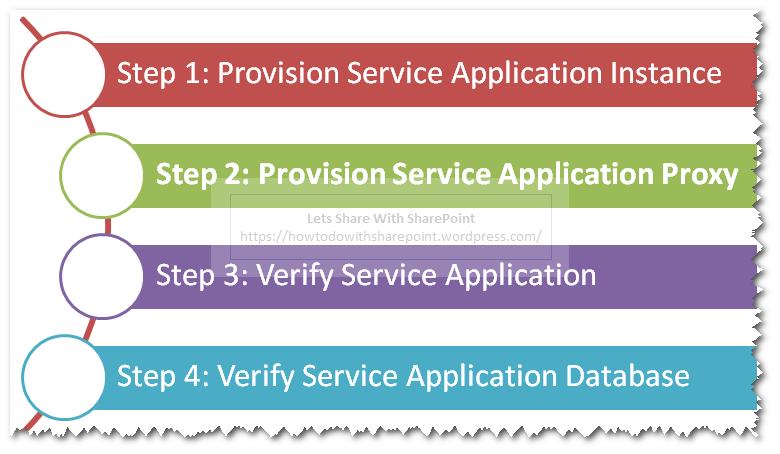
Step 1: Provision Service Application Instance

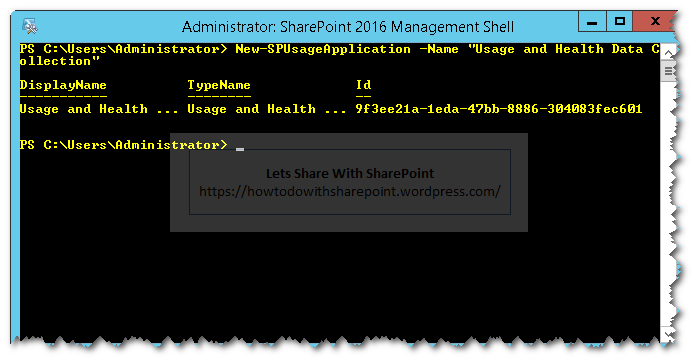
In this step, we will provision the Usage Service using “New- SPUsageApplication” cmdlet as shown below

New-SPUsageApplication -Name "Usage and Health Data Collection"

5

Step 2: Provision Service Application Proxy

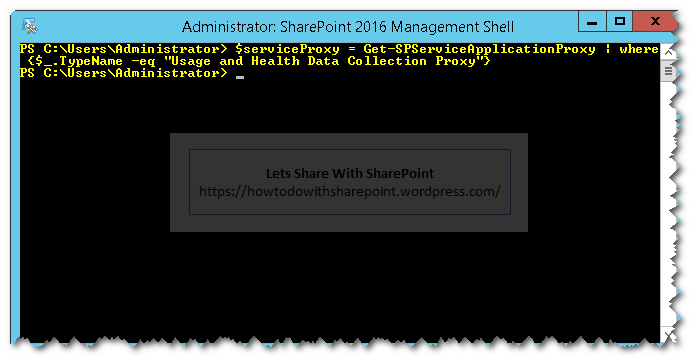
In this step, we will provision Service Application Proxy for Usage Service by using the following commands

$serviceProxy = Get-SPServiceApplicationProxy | where {$_.TypeName -eq "Usage and Health Data Collection Proxy"}

6

$serviceProxy.Provision()

7

Step 3: Verify Service Application

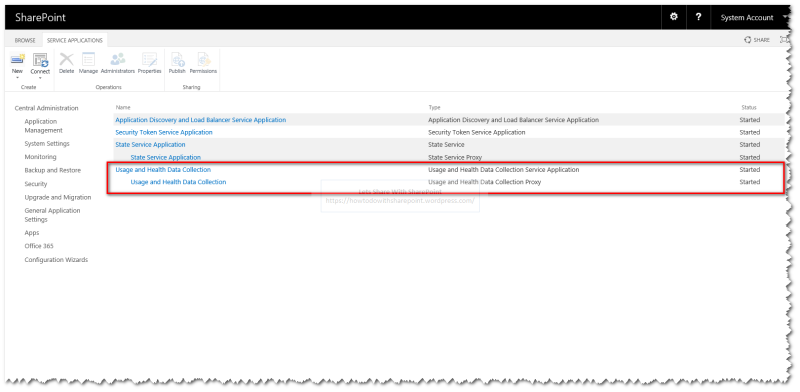
In this step we will verify the provisioning of service application by looking at “Service Application” Page in “Central Administration” as shown below-

8

Step 4: Verify Service Application Database

In this step we will verify the provisioning of service application database by logging into “SQL Server Management Studio” as shown below-

9

10

This concludes the Service Application Provisioning Process using PowerShell.

Hope you find it helpful.
SharePoint 2016: How to configure Search Service Application using PowerShell

In this article we will discuss how to provision Search Service Application for SharePoint 2016 using PowerShell

During this whole article I will guide you steps involved in provisioning Search Application along with the corresponding PowerShell Script

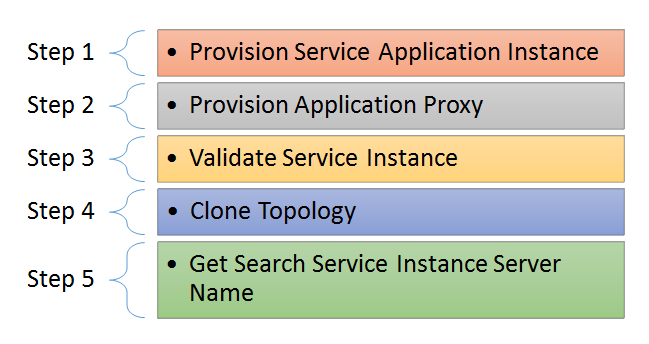
Here the steps that we will explore in the upcoming section-

1

2

3

Though we can provision Search Application from Central Admin as well but the purpose here is to demonstrate the use of PowerShell commands required to provision Search Application so that’s what we will do.

First let’s go to Central Admin to ensure that there is no existing instance of Search Service Application has been provisioned earlier

Under Application Management -> Click on “Manage Service Applications”

4

Here we can see what all Service Application Instances provisioned earlier and we can see there are none

5

Now launch SharePoint Management Shell to run the required PowerShell commands

6

We will run the PowerShell commands in the following order to make sure each Sub component provisioned as desired.

Step 1: Provision Service Application Instance

In this Step we will first provision Search Service Application using the following cmdlet-

$sa = New-SPEnterpriseSearchServiceApplication -Name "Search Service Application" -DatabaseName "SearchDB" –ApplicationPool  "SecurityTokenServiceApplicationPool"

Make sure Application Pool should exists before you run this command else it will fail since this cmdlet wont’ add the Application Pool automatically

7

Step 2: Provision Application Proxy

Then we need to provision Application Proxy by using following cmdlet referring the Service Application Instance provisioned in the previous step

New-SPEnterpriseSearchServiceApplicationProxy -Name "Search Service Application Proxy" -SearchApplication $sa

8

Step 3: Validate Service Instance

Next step is to validate that the Service Instance is online and to do so we can use the following cmdlet

Get-SPEnterpriseSearchServiceInstance -local

9

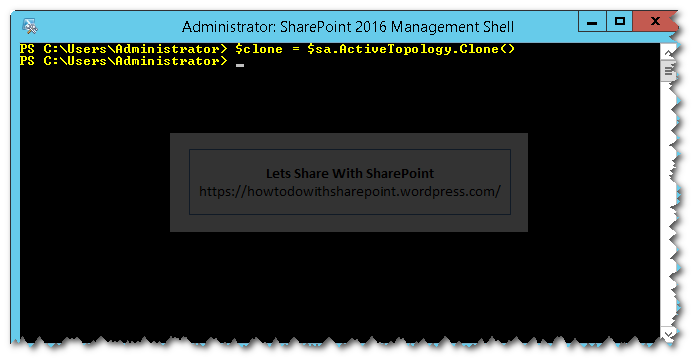
Step 4: Clone Topology

Next step is to clone the topology which is required in order to make any changes to the search topology in a search installation that has items in the search index

As per Microsoft recommendation around this you need to modify this new topology object, which is a clone of the active topology, by adding or removing search components. After you have made the changes to the clone topology object, you have to activate this clone to have this topology in action.

$clone = $sa.ActiveTopology.Clone()

10

Step 5: Get Search Service Instance Server Name

This Server name is required in the upcoming steps to it is wise to make use of the following cmdlet to retrieve the server name

Get-SPEnterpriseSearchServiceInstance| Select Server

11

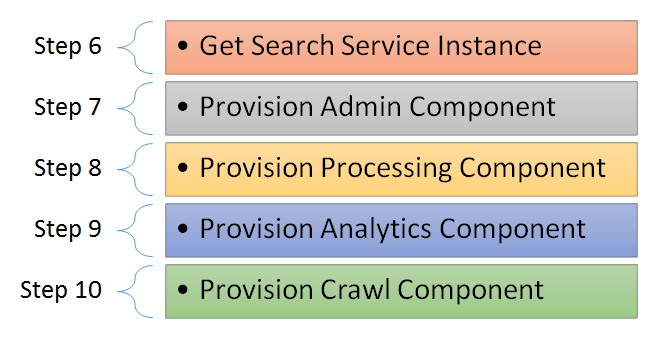
Step 6: Get Search Service Instance

Then we get handle over the search service instance running on the respective server using the following cmdlet

$si = Get-SPEnterpriseSearchServiceInstance | ?{$_.Server -match "SP-2016-Dev"}

This reference object will be used in the upcoming steps

12

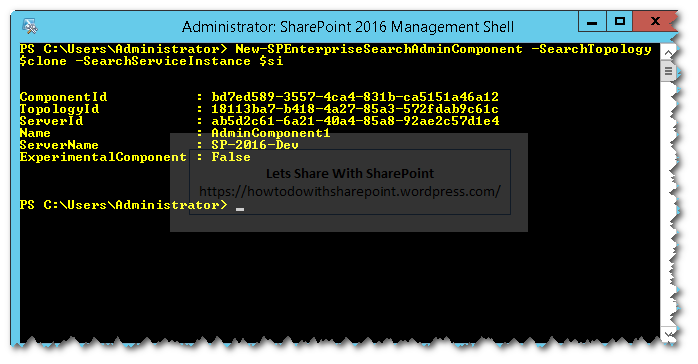
Step 7: Provision Admin Component

Next step is to provision a new Admin Component for the given topology and search service instance using the following cmdlet. This cmdlet is using reference to search service instance we get in the earlier steps

New-SPEnterpriseSearchAdminComponent -SearchTopology $clone -SearchServiceInstance $si

13

Step 8: Provision Processing Component

Next step is to provision new content processing component for the given topology and search service instance using the following cmdlet

New-SPEnterpriseSearchContentProcessingComponent -SearchTopology $clone -SearchServiceInstance $si

14

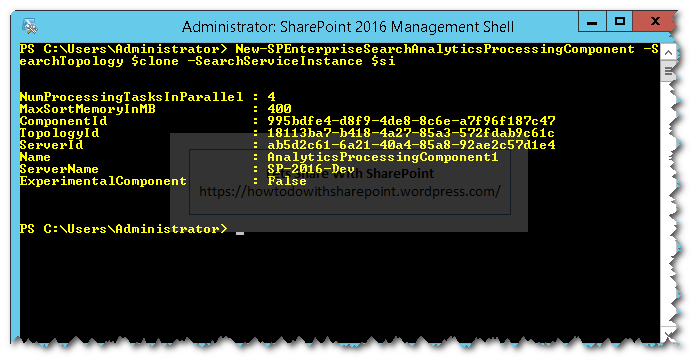
Step 9: Provision Analytics Component

Then we have to provision new analytics processing component for the given topology and search service instance using the following cmdlet

New-SPEnterpriseSearchAnalyticsProcessingComponent -SearchTopology $clone -SearchServiceInstance $si

15

Step 10: Provision Crawl Component

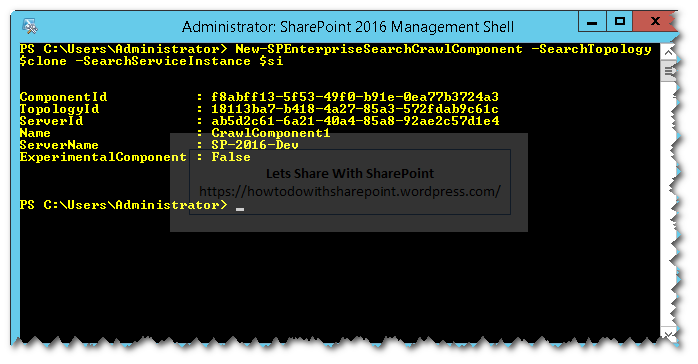
Then we have to provision new crawl component for the given topology and search service instance using the following cmdlet

New-SPEnterpriseSearchCrawlComponent -SearchTopology $clone -SearchServiceInstance $si

16

Step 11: Provision Index Component

Then we have to provision new index component for the given topology and search service instance using the following cmdlet

New-SPEnterpriseSearchIndexComponent -SearchTopology $clone -SearchServiceInstance $si -IndexPartition 0 -RootDirectory C:\SearchIndex\

RootDirectory: Specifies the root directory that will hold the index location for the new search index component. If you plan to isolate the index on dedicated discs in order to avoid I/O contention that may leads to performance degradation as it might be a risk that index filling up the OS disk and ruin the overall server performance.

17

Step 12: Provision Query Component

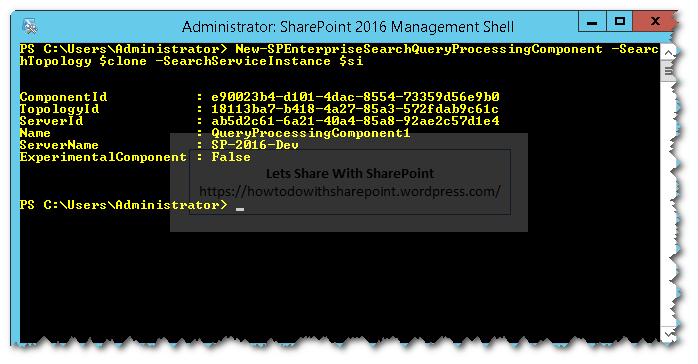
And finally we have to provision new query processing component for the given topology and search service instance using the following cmdlet

New-SPEnterpriseSearchQueryProcessingComponent -SearchTopology $clone -SearchServiceInstance $si

18

Step 13: Activate New Topology

Once all the components has been added to the new topology, activate it by using following cmdlet

$clone.Activate()

19

Step 14: Clean Inactive Topologies

Finally we have to clean all the inactive topologies associated with a search service application. We can perform this clean by using the following the code using “Remove-SPEnterpriseSearchTopology” cmdlet

foreach($tp in (Get-SPEnterpriseSearchTopology -SearchApplication $sa | ?{$_.State -eq "Inactive"}))
{    
   Remove-SPEnterpriseSearchTopology -Identity $tp -Confirm:$false
}

20

Step 15: Change Default Content Access Account

And we can change the default content access account by using the following code

$sa = Get-SPEnterpriseSearchServiceApplication

$content = New-Object Microsoft.Office.Server.Search.Administration.Content($sa)

$content.SetDefaultGatheringAccount("<Enter User Name>", (ConvertTo-SecureString "<Enter Password>" -AsPlainText -Force))

21

Now it is time to validate if search service application has been provisioned correctly.

Go to Central Admin -> Manage Service Applications

We can see a new Search Application has been provisioned successfully by clicking the Search Service Application Link

22

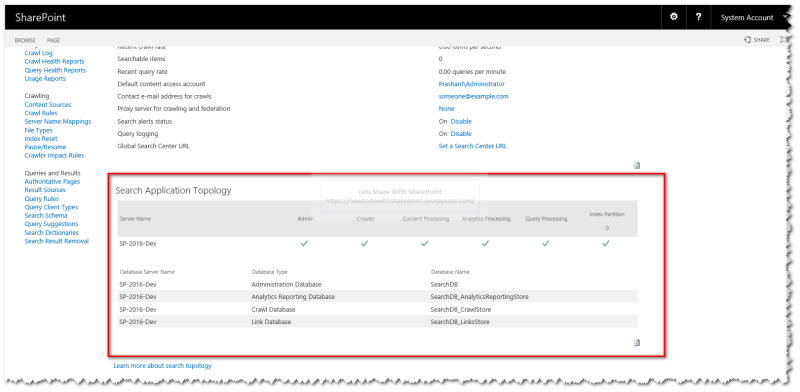
And we can see all the component are provisioned and running as expected.

23

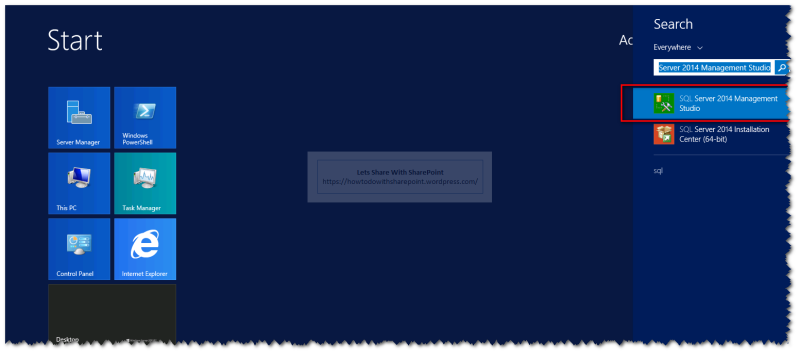
Also we can validate the SQL Databases that has been provisioned during creating new search service applications as shown in the following screenshots

242526

Hope you find it helpful.
SharePoint Online/2016/2013: How To Upload Large Files Using PowerShell Automation

Uploading large files to SharePoint On-Premise or Online is an obvious problem during data migration from any external systems like Lotus Notes.

Here is one of such errors which we might encounter while trying to upload a file of size greater than 250 MB-

1

In this article I will explain a data upload strategy where we can split a large file into multiple chunks of smaller size.

Solution Architecture Diagram

For better understanding we can refer to the following solution architecture diagram-

2

Based on this diagram we can conclude the following facts-
1. This solution can be hosted on multiple servers to launch parallel uploads
2. This solution can consume data from Network File Shares
3. Once data file is retrieved (say of size 300 MB), this solution will split the file (100 MB) automatically based on the pre-configured chunk size (which should not exceed the size limit of 250 MB)
4. Each chunk then appended to the file uploaded in multiple iterations

In order to start with this demo we would need a SharePoint Document Library in SharePoint Online (or On-Premise) Site as shown below-

3

Another prerequisite to demo is to have files of various sizes that we can use to upload to the document library.

I made use of following command line utility to generate files of various sizes. This utility takes destination folder path and size of the file in KBs as input.

Here is the usage example of the command line utility-

fsutil file createnew "C:\Prashant\Self Paced Training\Sample Files\2GB.txt" 2147483648

Similarly I have generated other files too as shown below-

4

Now let’s dive down into the code to understand the actual implementation.

Step 1: Declare a variables to hold the document library name & folder path. For production use I recommend to have these values in an external configuration file.

Step 2: Reading files from the folder specified in path variable in Step 1

Step 3: Loop through all the files and pass each file to the “UploadLargeFiles” function along with the document library name

5

Step 4: Generate unique upload id & get file name of the file to be uploaded

Step 5: Get handle on document library object and load the root folder (or any target folder) with in the document library

Step 6: Calculate the block size to be uploaded and total file size (as shown in the architecture diagram)

Step 7: Read the bytes from the source file and set the read buffer based on the block size

6

Step 8: Read the bytes based on the buffer limit that we set in earlier steps

7

Step 9: Check if this is the first chunk that is being uploaded, if yes then add a new file to SharePoint Document Library, get the file content based on the buffer size for the chunk and call “StartUpload” function that is defined under “Microsoft.SharePoint.Client.File” class. This will add the file to the document library but with small bunch of content only.

Step 10: Check if this is not the first chunk that is being uploaded, if yes then find the file in document library and get the handle on it

Step 11: If this is another chunk of data which is not the last chunk, this chunk will be appended to the same file by using “ContinueUpload” function that is defined under “Microsoft.SharePoint.Client.File” class. This will append the content to the file identified by Upload Id that we have initialized in earlier steps.

Step 12: If this is last chunk of data, this chunk will be appended to the same file by using “FinishUpload” function that is defined under “Microsoft.SharePoint.Client.File” class. This will append the content to the file identified by Upload Id that we have initialized in earlier steps and commits the changes to the file. Once this function completes successfully the changes will be made persistent to the file.

8

Step 13: Perform exception handling and call the “UploadLargeFileToLibrary”

9

I recommend to read the documentation on Microsoft.SharePoint.Client.File class and understand functions carefully before using it.

Once we execute this script we can see the following information-

  1. File Name to be uploaded
  2. Chunk size
  3. Total Time taken to upload the files

It is important to note that total time taken to upload the files may vary depending on the hosting environment.

File Size to be uploaded: 10 MB

10

File Size to be uploaded: 50 MB

11

File Size to be uploaded: 500 MB

12

File Size to be uploaded: 2 GB

13

Once the script executed successfully we can see the respective files uploaded to the SharePoint Online Site as shown below-

14

That is all for this demo.

This article is equally applicable for both SharePoint Online & On-Premise Versions.

Hope you find it helpful.

SharePoint 2016: Forms Based Authentication – Part 4

In the previous article SharePoint 2016: Forms Based Authentication – Part 3 of this series on implementing FBA with SharePoint we saw the execution of Step 5 for the process.

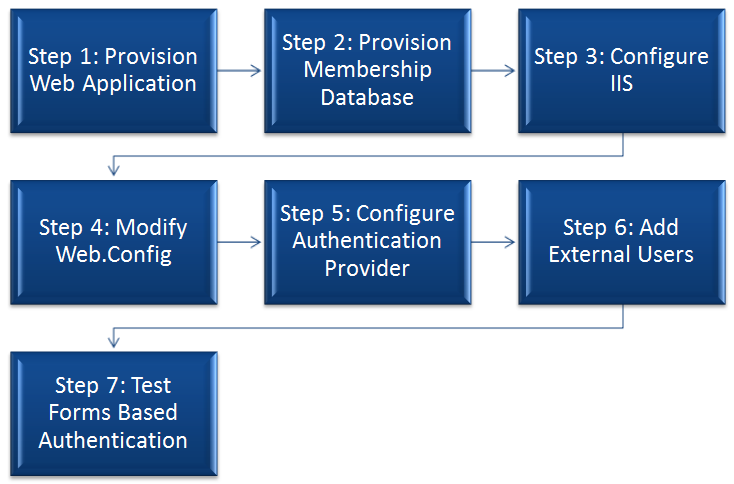
In this last article of this series we are going to see the execution of Step 6 & 7 and for the sake of quick review I am putting up the process diagram again in here.

Process Diagram

1

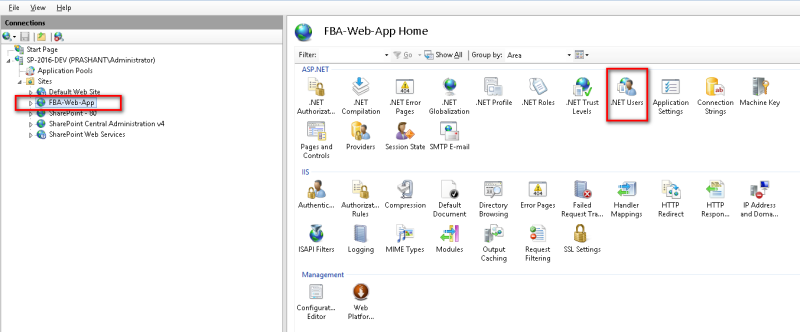
Step 6: Add External Users

  • Go to IIS
  • Select the Web Application on the left navigation pane
  • Click on “.Net Users” on the right section

2

Sometimes you might encounter the following error, this happens because the Default Provider is not set at the time you are trying to Add Users

3

In order to set the default provider you need to click on the “Set Default Provider” link under Actions Pane on the right

4

Select the membership provider as we configured in the earlier steps

5

Now you can add the users.

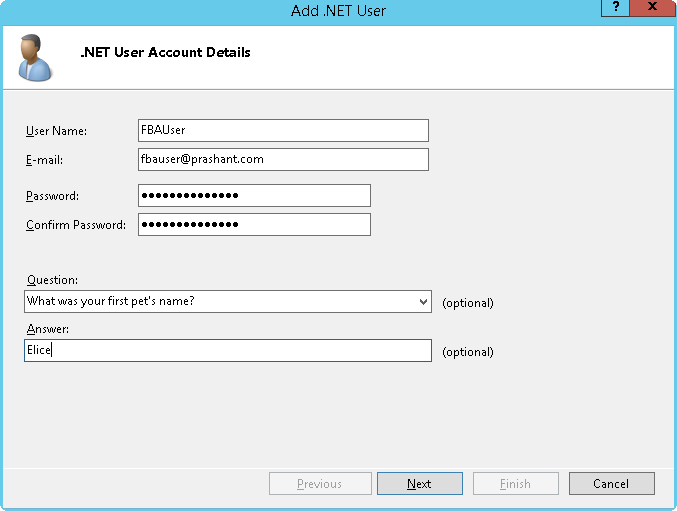
Click on the “Add” Link under the Actions Pane

6

Adding user information as needed

7

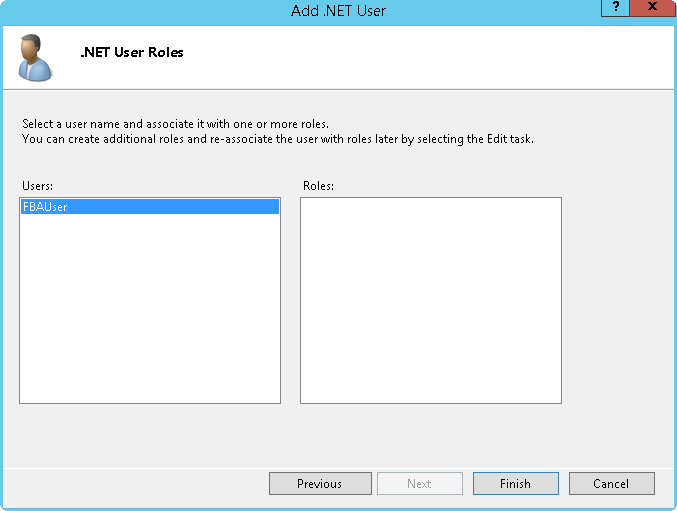
Click “Next”

8

Click “Finish”

And we can see the first FBA user in our system

9

Step 7: Test Forms Based Authentication

Browse the Web Application Via browser

We can see the Selection Window for the choosing the preferred Authentication mechanism

10

Let’s choose Windows Authentication first since we did not give explicit permissions to the FBA User yet, that is why system won’t allow the user to login to the SharePoint Site.

11

And being a authenticated Windows User we are good to go and able to see the Web Application Home Page

Then click on “Site Settings”

12

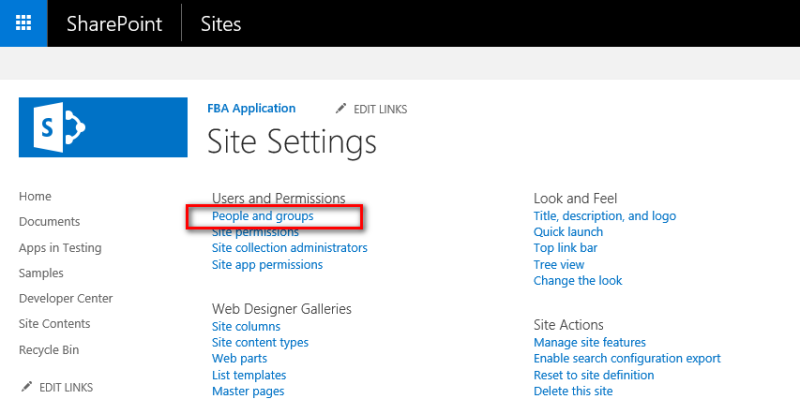
Click on “People and groups”

13

Click on “Add Users” to add new user to the desired security group.

In here I am adding new user to the Members Groups.

14

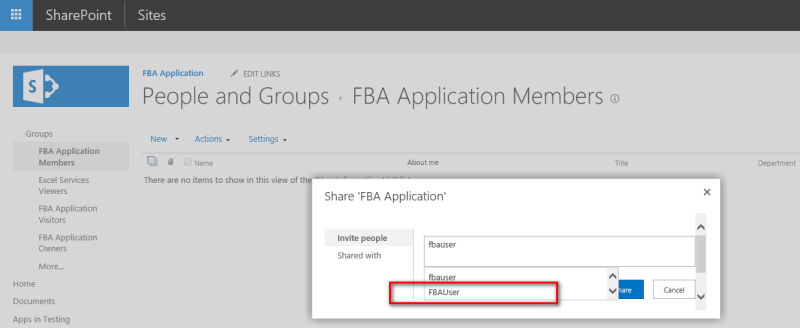
Type the name of the FBA user that you have added

In here the FBA User name is “FBAUser”

15

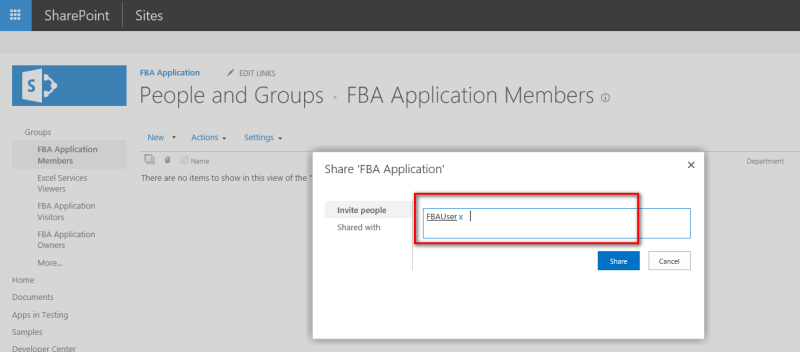
Share the site with FBA user

16

We can see the FBA User added to the Group

17

Now when we are going to browse the Web Application and go with Forms Based Authentication

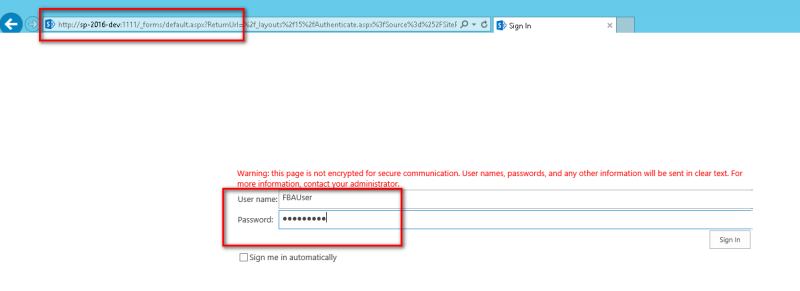
Choosing this setting will present default login page as we selected in the earlier steps while enabling Web Application with FBA.

Enter FBA user name & password

18

And since we granted the permission to this FBA User in the SharePoint Site, SharePoint allows you to login to the site using FBA user credentials.

19

That is all for this series.

Hope you find it helpful.

SharePoint 2016: Forms Based Authentication – Part 3

In the previous article SharePoint 2016: Forms Based Authentication – Part 2 of this series on implementing FBA with SharePoint we saw the execution of Steps 3 & 4 for the process.

In this article we are going to see the execution of Step 5 and for the sake of quick review I am putting up the process diagram again in here.

Process Diagram

1

Step 5: Configure Authentication Provider

In this step we will associate the Membership Provider with the Web Application that we want to enable with Form Based Authentication

  • Go to Central Administration
  • Click on Manage Web Application

2

  • Select the Web Application
  • Click on “Authentication Providers” link in the ribbon bar

3

  • Click on the Zone “Default”

4

On the Authentication Provider Screen

  • Check “Enable Forms Based Authentication (FBA)”
  • Specify the Membership Provider Name “SPMembership” that we configured previously
  • Specify the Role Manager Name “SPRoles” that we configured previously

5

Under “Sign In” Page Section you can choose to configure a Custom Sign Page if you need or you can proceed with Default Sign Page provided by SharePoint OOB.

In this case I am going along with Default Sign Page offered by SharePoint OOB.

6

That is it for this part of the demo.

I will see you guys in the next article covering Steps 6 & 7 as follows-

SHAREPOINT 2016: FORMS BASED AUTHENTICATION – PART 4

Hope you find it helpful.


SharePoint 2016: The Inside Story

This small write-up is based on the Presentation made by Bill Baer on “BRK2188 – What’s New for IT Professionals in SharePoint Server 2016” in Ignite Conference ended recently.

In this presentation Bill explained a lot of Enhancements & Improvements in SharePoint 2016, the Public Preview of which is going to hit the market soon. I have compiled the Key Takeaways under different categories as mentioned below-

Release Timeline Milestones

Regarding the release timeline, there are 3 milestones:

  • Q4 2015 – Public Beta (Beta 1)
  • Q1 2016 – Release Candidate
  • Q2 2016 – Final Version (RTM)

Hardware & Software Requirements

Hardware requirements are mostly the same as we have in SharePoint 2013:

  • Memory: For Single Server Deployment Scenarios it should be 16-24 GB. For Multi Server Deployment Scenarios it should be 12-16 GB
  • CPU: For either of the Deployment Scenarios it should be x64 Bits, 1 Quad Core
  • HDD: For either of the Deployment Scenarios it should be 80 GB

Software requirements have got a couple of changes:

  • Operating Systems : Windows Server 2012 R2 or Windows Server 10
  • Database Server: SQL Server 2014 or SQL Server 201x (VNext)
  • .Net Framework:5.2 if running on Windows Server 2012 R2 or 4.5.6 if running on Windows Server 10

Other Prerequisites:

  • Windows Management Framework 3.0
  • Application Server Role
  • Web Server (IIS) Role
  • Microsoft .NET Framework 4.5.2
  • Update for the .NET Framework 4 (KB2898850)
  • Microsoft SQL Server 2012 Native Client
  • Microsoft Identity Extensions
  • Microsoft Sync Framework Runtime v1.0 SP1 (x64)
  • Windows Server AppFabric 1.1
  • Windows Identity Foundation v1.1
  • Microsoft Information Protection and Control Client
  • Microsoft WCF Data Services

Deployment Scenarios

Unsupported Scenarios:

  • Deployments on Workgroup is not supported
  • Deployments on Client OS is not supported
  • Deployments with Dynamic Memory is not supported
  • Deployments on Windows Web Server is not Supported
  • Deployments in Standalone mode (Mode with In-Built SQL Server Express) is not supported

Supported Scenarios:

  • Deployments on Domain Controller is supported but recommended only for Development/Evaluation or Small Farms Scenarios
  • Deployment with Single Server Farm recommended only for Development/Evaluation Scenarios

Roles & Services

With SharePoint 2016 Microsoft introduces a new concept “MinRole” that governs the notion of processing a User Request End To End by a specific server. Based on the type of requests, these Roles and Services are broadly categorized under following categories:

  • User Services: All requests initiated by Users fall under this category. For example- Excel Services, User Profile, OneNote, Sync Clients, User Code (Sandbox Code), Project and so on.
  • Robot Services: All Automated, Scheduled Jobs fall under this category .For example- Timer Jobs, Search Applications and so on
  • Caching Services: All requests regarding Cache Management Scenarios and sometimes can hold up Request Management Scenarios as well. For example- Caching Services

MinRole Roles & Services are implemented as follows:

  • WebFrontEnd: This Role falls under “User Services” so this role is meant to serve End User Request. Servers assigned to this role are optimized for low latency. Services complying with this role are:
    • Access Services
    • Business Data Connectivity
    • Central Administration
    • Managed Metadata
    • Secure Store Service
    • State Management
    • Subscription Settings
    • User Code
    • User Profile
    • Visio Graphics
    • SharePoint Foundation Web Application
  • Application: This Role falls under “Robot Services” so this role is meant to serve backend jobs or Servers assigned to this role are optimized for low latency. Servers assigned to this role are optimized for high throughput. Services complying with this role are:
    • Crawl
    • Machine Translation
    • PowerPoint Conversion
    • User Profile Synchronization
    • Word Automation
    • Workflow Timer Service
    • SharePoint Foundation Web Application
  • Specialized Load: This is special type of role to support Random Role Assignments as per business requirements like we have in SharePoint 2013. Recommended for Deployment of Isolated Services like 3rd Party Applications etc. This Role is not accounted by Health Checkup Analyzer as this is exempted in the Product Code Base of SharePoint 2016. Services complying with this role are:
    • Excel Calculation
    • PerfomancePoint
    • Project
    • Search
    • SharePoint Foundation Web Application
  • DistributedCache: This Role falls under “Caching Services” so this role is meant to distributed cache for the farm. Servers assigned to this role can load balance end user requests among the Web Front Ends. Services complying with this role are:
    • Distributed Cache
    • Request Management
    • SharePoint Foundation Web Application

1

Role Enforcement and Health:

  • SharePoint Health Analyzer has new Health Checkup Rules running on Daily Basis checking for the Topology Compliance
  • This Health Rule will run Daily and scan all the servers in the farm except server assigned to “Specialized Load” Role
  • The Code Base for this Health Rule compares the Service Instances on each server with the Role assigned to it and verify if the server comply with expected Topology recommendations from Microsoft. If Server doesn’t comply with the expected Topology recommendations, in health analyzer we can see the option to fix it directly from there.

Upgrade & Migration

  • Upgrade from SharePoint 2010 (UI Mode 14 or 14.5) and SharePoint 2015 (UI Mode 15): Upgrading to SharePoint 2016 will only be supported from SharePoint 2013. If you’re still using SharePoint 2010 or a previous version, you’ll first have to upgrade to SharePoint 2013 and your site collection will have to be converted to 15 mode before you can upgrade to SharePoint 2016.
  • Upgrade via Database Attach: The upgrade is done via the database attach process, so nothing new here.
  • Migration: You can also choose to migrate content from a previous version of SharePoint using one of the available third party software applications.

 Patching

Small Patch Size with no downtime:

  • Patches and updates will have a smaller footprint and will not require any downtime.
  • As with most of the new features, the new patching process was developed for SharePoint Online and SharePoint 2016 will now benefit from the lessons learned from managing SharePoint in the cloud.
  • In SharePoint 2013 an update is comprised of 37 packages and an additional 18 packages for each installed language pack.
  • In SharePoint 2016, an update is comprised of just 4 packages, plus 1 extra package for each installed language pack.

 Boundaries and Limits

In SharePoint 2016, here are the main improvements on different thresholds values:

  • Content Databases: Supports content databases with TBs (specific number is not yet defined). In SharePoint 2013 Size should not be more than 200GB per content database.
  • Site Collections: Supports 100,000 site collections per content database. In SharePoint 2013 this limit was 10,000 site collections per content database.
  • List Items: List item threshold will be over 5,000 items although no specific number is not defined yet.
  • Max File Size powered by BITS Protocol + Cobalt Protocol + Shredded Storage: Max file size is now 10GB and there won’t be character restrictions. Earlier it was 2GB in SharePoint 2013 with character restrictions. This file size is supported to be Uploaded or Downloaded is powered by combination of BITS Protocol (which is newly introduced in SharePoint 2016), Cobalt Protocol and Shredded Storage.
  • Search Indexing: Search index can now scale to to hold upto 500 million items which was 250 million items in SharePoint 2013’s search index

Performance and Reliability Enhancements

Some of these improvements were brought to SharePoint 2016 which is expected to support a four-9s availability level (99.99%):

  • Server role optimizations
  • Zero downtime patching strategy
  • Improved distributed cache reliability
  • Traffic management with intelligent routing and server health checks

Major Performance/Reliability/Flexibility improvements that can be seen in SharePoint 2016:

  • New File Management Protocols: SharePoint 2010 introduced the Cobalt protocol. With Cobalt, when a document is being edited and the user saves it, only the modified portion of the file is sent by the client application to the server, greatly reducing the amount of data transmitted between client and server. However, the server still has to fetch the whole document from the database and merge the existing content with the user changes before saving the whole document back to the content database. SharePoint 2013 brought the Shredded Storage mechanism which allows documents to be stored in small pieces in the content database. Because documents are already “shredded” in the database, the server does not have to fetch the whole document to merge the original contents with the changes, which reduces the server processing overhead. SharePoint 2016 adds BITS (Background Intelligent Transfer Service) protocol which will improve upload and download speeds and resiliency.
  • “Fast Site Creation“– A new Site Collection creation process: The new site collection creation process leverages the Copy method to clone a pre-configured site collection template at the content database level. This process avoids the overhead of feature activation since the features are already activated in the source site collection.
  • SMTP Connection Encryption: With the implementation of new “STARTTLS” connection encryption that supports sending mails to SMTP Servers on default or non-default ports. Earlier with till SharePoint 2013, only Default Port (25) was supported for SMTP Communications but now it is possible to choose any available port with the new “STARTTLS” connection encryption
  • User Profile Service: In SharePoint 2016 Bidirectional Synchronization has now been improved by removing built-in FIM Services and adding support for External FIM Service. 
  • Integrated Project Server: SharePoint 2016 included built-in Project Server with licensing controlled through Server/User Licensing

 2

  • Support for ODF Format: SharePoint 2016 included support for ODF Format in Document Libraries where documents can now be saved in ODF Format and then can be edited in with program of choice.

 UI Improvements

SharePoint 2016 looks and feels mostly like the current version of SharePoint Online (in Office 365), but a few improvements were made to the UI, namely:

  • Authoring Canvas: New Authoring Canvas, a new and modern way to create content for a web page using a Sway-like user experience
  • Durable Links: Support for Durable Links which allows documents to be moved while keeping the URL intact, because it is based on a resource ID

Cloud Accelerated Experiences

One of the most touted new features of SharePoint 2016 is the support for cloud accelerated experiences or, in other words, the ability to surface features that are only available in the cloud, using a hybrid scenario:

  • Compliance: Compliance and data loss prevention (DLP) across cloud and on-premises. Sensitive Data can be Identified, Monitored and Protected through deep content analysis.
  • Cloud Search Service Application: Cloud search service application which unifies the on-premises and cloud search indexes and provides support for Office Graph / Delve experiences on-premises. As per plan this service will be available to SharePoint 2013 also by the end of this year
  • Distributed team sites: Distributed team sites across SharePoint 2016 and Office 365
  • Hybrid deployment: Hybrid deployment automation guided by UI-based configuration

 Summary

  • SharePoint 2016 is still a year away which means some features are liable to change, improve and could be some more to be added by the time RTM Version is released next year.
  • Hybrid scenarios are easier than ever to deploy

Hope you find it helpful.