What are Display Templates?
Display Template is a new technique introduced in SharePoint 2013 in order to modify the look and feel of the search results by making use of HTML & JavaScript instead of XSLT modifications as we did in the earlier versions.
With this new rendering technique or rather framework, SharePoint offers some of the most compelling advantages as mentioned below:
- Display Templates Support HTML & JavaScript instead of XSLT (which is often quite cumbersome to work with).
- Display Templates based configurations supports a broader scope of execution than XSLT based configurations. (As Display Templates should be defined at Site or Site Collection Scope while XSLT based Templates could only be defined at the WebPart Scope).
- Display Template applies Per Item Basis and not Per Result Set Basis (Provides us with the Context of the Current Item which is under execution, so that we can make use of any Managed Metadata Property associated with the Search Result Item and render it as per needs)
- As the Display Templates are scoped to Site or Site Collection, they can be used for all kind of results, can be used with in Content Search Web Part, Refiners and so on.
I recommend you to follow this MSDN Article on Display Templates to get an in depth understanding on the topic.
By now we got a fairly good Idea on “What are Display Templates?” and now it is time to see them in action.
Business Scenario:
- Additional User Profile Property should be added to User Profile Page which will hold the User’s LinkedIn Profile URL.
- There should be a provision to adjust the display position of this Property in Core Search Result Web Part.
Prerequisites:
- User Profile Service should be up and running
- User Profile Synchronization should be configured
- Search Service Application Instance should be configured appropriately
- Search Center Site Collection should be configured appropriately
In order to see Display Templates in Action, we need to perform following steps:
- Create User Profile Property
- Start Full Crawl of Content Source for the User Profiles
- Create, Map and Configure Managed Property
- Start Full Crawl of Content Source for the User Profiles
- Create Display Template
- Create Result Type with Custom Display Template
- Test Display Template
Create User Profile Property
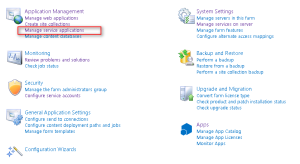
Go To Central Admin >> Manage Service Applications
Click on User Profile Service Application
Click on Manage User Properties
Click on New Property
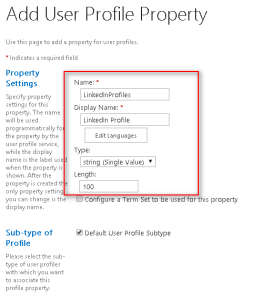
Enter Name, Display Name, Type & Length for the User Property as needed.
Make sure Default Privacy Setting must be set to Everyone
Make sure Indexed must be selected under Search Settings Section, else this property will be skipped by Search Crawler and it won’t be available to use later.
Once done with it click OK to add the User Property
Once added you can find the new property under Custom Properties Section
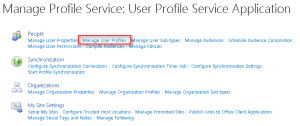
Go to Manage User Profiles
Find the required User Profiles and Edit their Profiles by selecting Edit My Profile from ECB Menu
On the User Profile Page, locate the LinkedIn Profile Property
Enter the URL to LinkedIn Profile of the User and Save the User Profile Properties
With this we are all done with the Creation of User Profile Property.
Start Full Crawl of Content Source for the User Profiles
Now in order to generate the Crawled Property corresponding to the User Profile Property we need to run the Full Crawl on the People Content Source
Go to Search Service Application
Click on Content Sources
Click on People Search and select Start Full Crawl from ECB
Wait till the Crawl Status become Idle
Create, Map and Configure Managed Property
Go to Search Schema
Click on Crawled Properties Link
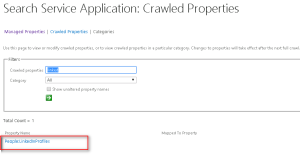
We should verify if the Crawl Property corresponding to our User Profile Property has been created successfully or not
Find the Crawled Property by entering Search Term in Crawled Properties Textbox and click on the Image button with Green Arrow image.
Make sure you should be able to see the Crawled Property which is created during the Full Crawl Process as shown below
New we need to create a new Managed Property and Map it with the crawled property shown in earlier step
Click on Managed Properties Link
Click on New Managed Property Link
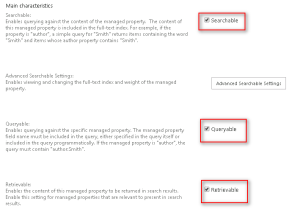
Enter Name, Description, Data Type for the Managed Property
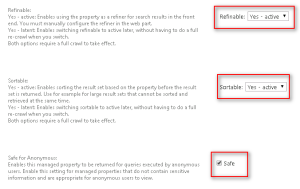
Select Searchable, Queryable, Retrievable, Sortable, Refinable and Safe as appropriate
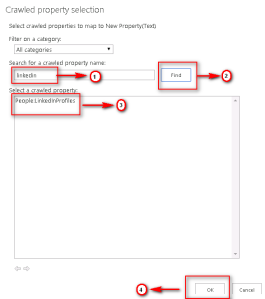
Click on Add Mapping Button
On the Crawled Property Selection Screen
- Enter Property Name
- Click Find Button
- Select appropriate Crawled Property
- Click OK
Save the Managed Property Definition
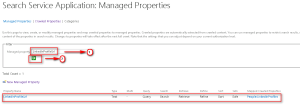
In order to verify newly Created Managed Property
- Enter Property Name
- Click Image Button
You should be able to see Managed Property with all the settings you specified earlier.
With this we are done with the creation of require Managed Property corresponding to the Crawled Property
Start Full Crawl of Content Source for the User Profiles
Now in order to fill the Managed property with the value stored with in Crawled Property based on the mapping, we need to run the Full Crawl again as we did before.
Create Display Template
Once we are done with the Creation and Configuration of required Managed Property, it is time now to create a new Display Template which will include this Managed Property
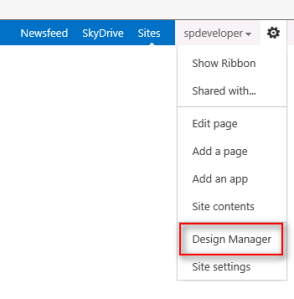
We need to launch Design Manager from the Standard Menu as shown below
Click on Upload Design Files
Click on Location URL as shown below
Click on Display Templates Folder
Click on Search Folder
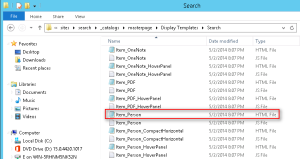
Since we need to modify the template for People Search Results, we need to modify the template Item_Person
Point of Caution: As a part of recommended SharePoint Practices, we should never edit and existing template, instead we should make a copy of it, rename it and then modify it as per our needs.
Open the Item_Person_LinkedIn Template file and make the following modifications
- Change the Title
- Added the Managed Property we created in earlier steps
Now you need to decide where exactly you want to place this Managed Property within the Display Template.
In our case I am going to place this below User Name
Find the Html Tag NameValue
Below this tag add the following code as shown below
- Check if LinkedInProfileUrl Managed Property is not Empty
- Add HTML snippet to display the value stored in LinkedInProfileUrl Managed Property
- Close the IF block
Save the file and copy it back to the same location
SharePoint generates a JS File corresponding to this HTML file automatically, and the JS file should not be modified by the users. This JS file will be maintained and modified by SharePoint system automatically based on the changes you have made in HTML File.
With this we are done with the development of new Display Template.
Create Result Type with Custom Display Template
Now the next step is to create a new Result Type, which will be using our new Display Template to display the Search Results
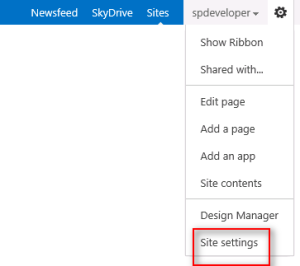
Go to Site Settings
Click on Result Types
Click on New Result Type
- Provide Name to the Result Type
- Select Result Source
- Select Display Template (the one we have just created)
- Save Result Type
We can see the newly created Result Type on Manage Result Type Page as shown below
With this we are all done with development of new Display Template, it is time to test it now.
Test Display Template
Search for the Users and sure enough you will find the new Property appears only for those User Profiles which contains a non-empty value for LinkedIn URL Property.
From the above walkthrough we can conclude the fact that Display Templates are simple but really powerfull mode of customizing Search Result Page as per custom needs.
Hope this help someone in need…

















Very Good article Prashanta… I personally liked it…
Thanks Bijay.
Your feedback is highly motivating to me.
Great job. You Rock! Please keep it up!
Thank you so much.
Mark
Thanks for your feedback Mark.
It really nice to know that you found it helpful.
Superb explanation and clear steps! Thanks very much Prashant Bansal.
Thanks Sridhar. Glad you find it helpful.
Excellent article…
Thanks Sridhar. Glad you find it helpful.
Nice Explanation…Great!!
Thanks Pavan. Glad you find it helpful.